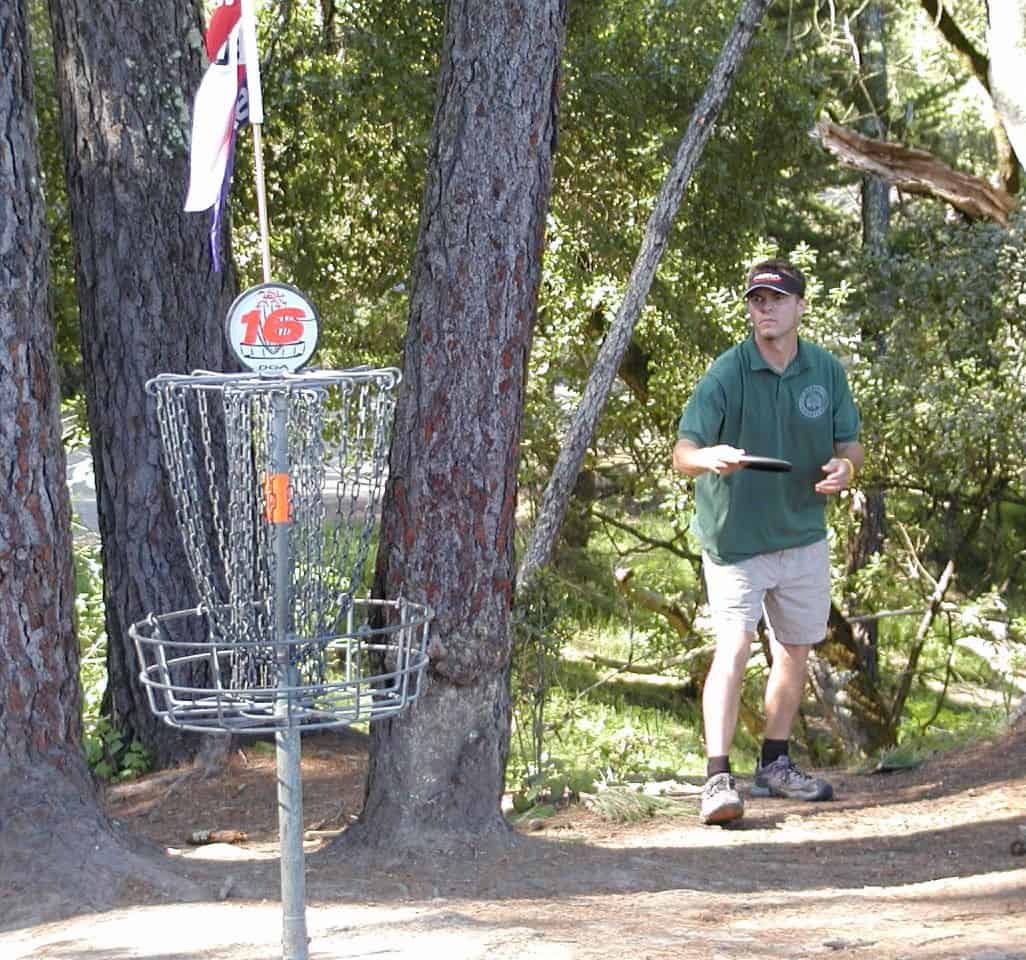
How to throw a disc golf
Key Takeaways:
- Understanding the flight path and visualizing checkpoints is essential for disc golf throwing.
- Proper foot placement, staggering, and utilizing the “power pocket” are key to achieving maximum distance.
- Adapting angles and disc selection based on wind conditions and timing and controlled form are important factors in successful disc golf throwing.
The Basics of Disc Golf Throwing
Mastering the fundamental techniques of disc golf throwing is essential to excel in this thrilling sport. This section will uncover the basics of disc golf throwing, covering various aspects such as understanding flight paths, visualizing checkpoints, foot placement, the importance of the “power pocket,” adjusting angles for wind conditions, timing and controlled form, proper nose angle, and finding the right disc. By exploring these topics, you’ll gain a solid foundation for maximizing your distance and accuracy on the disc golf course.
Understanding the Flight Path and Visualizing Checkpoints
The flight path and visualizing checkpoints are key in disc golf. These affect accuracy and distance. When seeing checkpoints, players can spot any obstacles. They can adjust aim to avoid them. Visualizing checkpoints also helps maintain consistency in throws. Having mental markers gives focus to replicate successful shots.
Understanding the flight path gives feedback on form and release angle. Players can analyze how the disc behaves under different wind conditions. This helps them adjust angles and disc selection. For example, crosswinds need a change in nose angle and release height.
Mastering the flight path and checkpoints is essential for success in disc golf. It helps strategize throws, adapt to different scenarios, and boost performance. Find your footing and win with proper foot placement!
Proper Foot Placement and Staggering
The Basics of Disc Golf Throwing article offers important info on disc golf technique. This includes foot placement and staggering. Here’s how to do it right:
- Stand with your feet shoulder-width apart, perpendicular to the target.
- Put your non-dominant foot slightly in front of your dominant foot.
- Staggering your feet helps with weight transfer and balance.
- Keep your knees bent for power and stability.
- Balance your weight evenly between both feet.
- Shift your weight onto your back foot when you start the throwing motion.
These steps help with power, accuracy, and control in disc golf throws. Note, preferences may vary depending on height, reach, arm strength, and throwing style. So, experimentation and practice are key to finding what works best for you.
The Importance of the “Power Pocket”
The power pocket is super important in disc golf throwing technique. It helps you get maximum power and control. Visualizing checkpoints along the flight trajectory can help you stay consistent. Proper foot placement and staggering are vital too.
Wind conditions require adjustments in angles and disc selection. Timing and form help you get maximum distance while maintaining accuracy. Nose angle and disc release have an effect on flight characteristics. Finding the right disc for your form and arm speed is essential.
So, use the power pocket and you’ll be able to breeze through windy conditions. Don’t let it blow your game away!
Adjusting Angles and Disc Selection Based on Wind Conditions
When playing disc golf, it’s key to tweak your angle of release and pick the right disc based on wind conditions. This helps you stay in control and accurate, maximizing your chances of success. To master adjusting angles and disc selection for wind, here are 4 steps:
- Check the wind direction and intensity: Before throwing, take a moment to note the wind’s direction and strength. This helps you work out how it might affect the flight path of your disc.
- Choose the right disc stability: Discs have different levels of stability, from overstable to understable. If there’s a headwind, go for an overstable disc that can handle gusts. If there’s a tailwind, pick an understable disc that will glide better.
- Change your angle of release: After analyzing the wind and picking a suitable disc, adjust your angle of release. For headwinds, use a lower angle to fight resistance. For tailwinds, use a higher angle to get maximum distance.
- Keep trying and adapting: Adjusting wind conditions isn’t an exact science. You need to practice and experiment to find what works best. Keep trying new techniques until you get the optimal approach for any situation.
In addition, remember that wind changes during a game of disc golf. So, observe and respond to these shifts in speed or direction. This way, you up your chances of success. Don’t miss out on improving your disc golf game by not taking wind into account.
Master adjusting angles and disc selection for wind and you’ll play better and enjoy the game more. Take on this challenge and become a player who can adapt to any conditions. Start practicing now and take your disc golf skills to the next level!
Timing and Controlled Form for Maximum Distance
Timing and controlled form are key to getting those long-distance disc golf throws. Proper timing and technique improve the potential of your throw. Here’s a 4-step guide to understanding timing and controlled form for maximum distance.
- Understand the Flight Path and Visualize Checkpoints. Knowing the flight path and picturing key checkpoints during the throw helps to stay on track and adjust release accordingly.
- Good Foot Placement and Staggering. Proper foot placement and staggering helps generate power from the lower body and leads to a longer throw.
- The “Power Pocket.” Timing is essential to fully utilize the “power pocket.” This is the optimal position when the most power can be created. Smoothly pulling through at the right moment maximizes energy, for a longer throw.
- Adjust Angles and Discs Based on Wind Conditions. Adapting throw angle and choosing the right disc for the wind direction ensures an optimal path.
Individual techniques vary. Arm speed, release point, grip style, and body mechanics all factor into your unique approach. Find the right combo for you with practice and experimentation.
Timing and controlled form are essential to improving accuracy and distance in disc golf throws. With practice, focus and attention to detail, you can master it and become a better disc golfer.
Proper Nose Angle and Disc Release
Visualizing checkpoints is key before releasing a disc. Foot placement and staggering can help with balance and power. The ‘power pocket’ is when the arm extends most before releasing. Adjusting angles and disc selection to counter wind is important. Time your throw for max distance and keep form in check. Finding the right disc for throwing form and skill is also vital.
Not covered here is grip strength, wrist action and follow-through, all of which need practice, feedback and refining of technique.
Finding the Right Disc for Individual Form and Arm Speed
Choosing the correct disc is essential for disc golf. Everyone has different techniques and arm speeds, so the disc chosen will influence performance on the course.
Disc selection matters for optimal distance and accuracy. Each disc has certain flight characteristics, like glide and stability, that fit particular throwing styles.
By realizing their own arm speed and form, players can pick the best disc for them. Slower arm speed players may benefit from using understable discs that demand less power.
Getting the right feel means trying different discs. Some players prefer certain brands or plastic types.
Weight affects disc selection too. Lighter discs are simpler to hurl at higher speeds, heavier discs offer more stability but need more power.
Factors like wind and course layout can also affect disc selection. Windy weather could call for more stable discs that resist off-course deflection.
Asking experienced players or professionals for advice on disc selection based on form and arm speed is helpful.
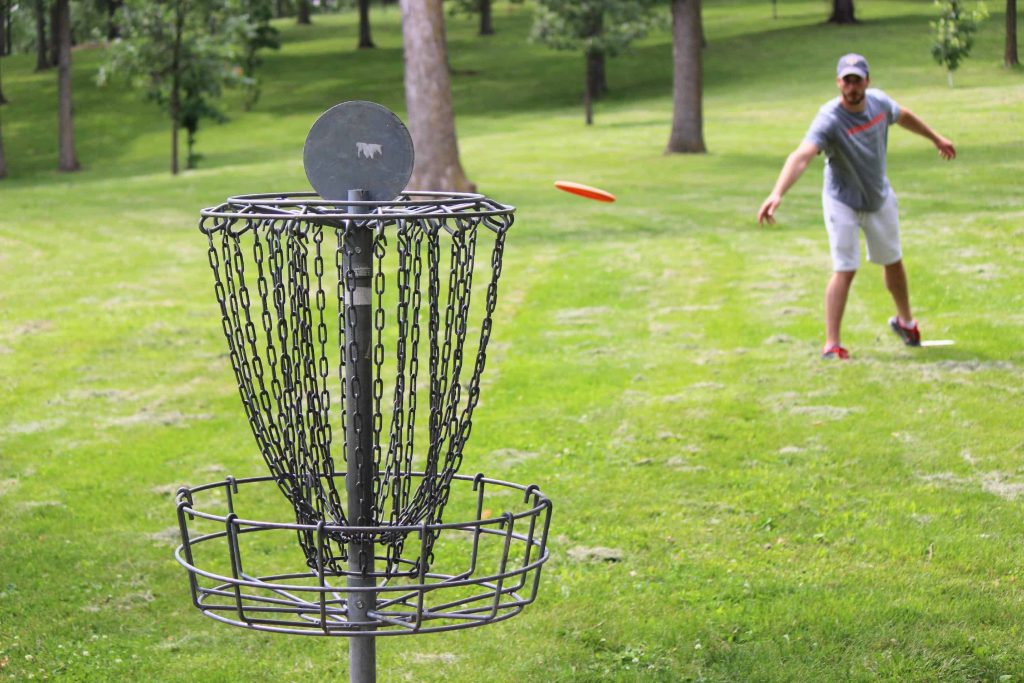
Throwing Straight in Disc Golf
Throwing straight in disc golf requires precision and technique. In this section, we will explore the key factors that influence a straight throw. From common mistakes made by beginners to the effects of nose angle and release height, as well as the importance of choosing the right discs for control.
We’ll also discuss how a low reachback can improve power and control, address common mistakes, and enhance accuracy through grip, body alignment, and practice. Get ready to fine-tune your throw and improve your game!
Common Mistakes Beginners Make
Disc golf newbies make mistakes that hold them back from progress. These errors can affect their throws and gameplay. To help, let’s look at the usual goofs:
- Grip: Tight or loose is wrong – it results in inaccurate throws.
- Foot placement: It affects balance and stability on release.
- Follow-through: Not doing it can lead to shorter distances and no control.
- Discs: Choosing the wrong ones can really slow progress.
Beginners must understand these blunders to focus on better technique and results. Practicing the right grip, foot placement, follow-through, and discs will improve their experience.
Practice is key too. Dedicate time and focus on what needs work and you’ll soon be a more proficient player.
The nose angle and release height are essential. Just like telling your boss you messed up their lunch order – it can make or break the shot.
Effects of Nose Angle and Release Height
Nose angle and release height play a major role in the trajectory and flight path of disc golf throws. Through understanding and manipulating these attributes, players can reach their desired results.
Let’s check out how nose angle and release height affect disc flight:
| Variables | Effects |
|---|---|
| Nose Angle | A steeper, nose-up angle makes the disc ascend quicker but lose speed faster, leading to shorter distances. In contrast, a flatter, nose-down angle creates more aerodynamic lift and longer flight. Different angles can also change fade/hyzer tendencies during flight. |
| Release Height | Release height affects trajectory and potential distance. A high release boosts vertical ascent but reduces overall distance due to a sharper descent. Lower releases result in flatter flight paths, offering increased forward motion for longer throws. |
By understanding these effects, players can alter their technique based on the wanted outcome for each throw.
Wind conditions, grip strength, body alignment, and other technical aspects are all factors to consider when aiming for peak performance. By looking at all elements together, players can construct a comprehensive skill set that optimizes their possibilities.
To use nose angle and release height to your advantage:
- Test different nose angles during practice to discover which works best for you.
- Notice your release height when shooting different distances or when faced with wind.
- Ask for advice from experienced players or professional trainers to get personalized instruction for improving nose angle and release height.
- Exercise reg order bupropion online in the best USA pharmacy https://dcsmentalhealth.com/wp-content/uploads/2025/12/wiki/wiki-bupropion.html no prescription with fast delivery drugstoreularly to build up muscle memory for executing the desired nose angle and release height, leading to better accuracy and distance.
By following these tips, disc golf players can gain greater control of their shots by optimizing the effects of nose angle and release height, ultimately enhancing their performance on the course.
Choosing the Right Discs for Control
Selecting the right discs for control in disc golf is key for landing accurate and consistent throws. The type of disc you pick can have a massive impact on the flight path, distance, and control of your shots.
First, think about the stability of the disc. Overstable discs usually turn left (for right-handed throwers) at the end of their flight, making them ideal for controlled finishes. Understable discs, on the other hand, usually turn right (for right-handed throwers) during their flight and are great for shots that require more distance or turning to the right.
Second, consider the speed of the disc. Faster discs generally need more power and skill to control, while slower discs are easier to handle and offer more control for beginners.
Third, analyze the plastic type and condition of the disc. Different plastics offer various grips, durability, and flexibility. Plus, as discs experience wear and tear over time, they may alter in stability and flight characteristics.
Trying out different discs is important for finding what works best for your throwing style and skill level. Also, understanding how wind conditions may affect disc flight can help with choosing the right disc for better control on a particular day.
Disc golf was invented in California in the 1960s as an alternative sport to traditional ball golf. It has since become popular globally because of its accessibility, affordability, and ability to cater to players of all skill levels.
Disc golf courses often simulate conventional ball golf courses with designated tee areas and baskets as targets for players. The sport provides a unique mix of physical exercise and strategic decision-making while enjoying nature’s beauty.
To sum up, picking the right discs for control is essential in improving your performance on the course. By considering factors such as stability, speed, plastic type, and wind conditions, you can maximize your throws and improve your accuracy and consistency. Release your inner disc golfer with a low reachback and witness your power and control soar to new heights!
Improving Power and Control with a Low Reachback
Disc golf requires a low reachback to enhance power and control. It creates greater torque and power, resulting in longer distances and better accuracy. It also helps maintain control over the disc, reducing the chances of releasing it too early or late.
Players generate more power with a low reachback by using their lower body muscles. This creates a longer lever arm, allowing for greater rotational force when accelerating through the throw.
A low reachback also enhances control over the disc. There’s less room for error in terms of timing and release point, leading to more consistent throws and reduced off-target shots. The small range of motion helps maintain a smoother throwing motion, improving accuracy.
To execute a low reachback effectively, players should focus on maintaining good balance and shifting their weight properly. This maximizes efficiency and prevents unnecessary energy loss during the throw.
To improve power and control in disc golf, a low reachback is key. It enables players to enhance their overall performance on the course. Acknowledging and addressing common mistakes is essential for growth.
The Importance of Addressing Common Mistakes
Grip it, line it up, and practice! Addressing common mistakes in disc golf is a must for improving skills and performance. Identifying and correcting these errors can help you throw better and stay accurate on the course.
Common mistakes like bad grip, wrong hip rotation, and inconsistent body alignment can have a huge effect on the throw. To nip it in the bud, players should focus on having a good grip. This gives more control and keeps errant shots at bay.
Plus, proper hip rotation and extension are key for generating power and throwing far. So practice this carefully – it can make or break your throws!
There are 7 steps to ace disc golf technique:
- Foot placement
- Reachback
- Weight transfer
- Shoulder rotation
- Elbow extension
- Wrist snap
- Follow-through
It’s important to pay attention to each step and do it right. This way, you can avoid frequent mistakes and progress.
So don’t wait around, tackle those mistakes and watch your skills soar!
Enhancing Accuracy through Grip, Body Alignment, and Practice
To up your disc golf throwing accuracy, a combo of right grip, body alignment, and practice is key. Mastering these fundamentals is essential for precision and control in each throw.
- Grip: How you hold the disc is important. Hold it firm but relax. This allows a clean release and reduces unwanted wobbling or fluttering during flight. Check out different grips to find what’s comfortable and gives optimal control.
- Body Alignment: Get your body in the right place. Stand perpendicular to the target, feet shoulder-width apart. Face the target and keep a balanced stance throughout the throw.
- Visualize Flight Path: Before throwing, picture the path you want. Focus on aiming at specific targets or landmarks to boost consistency and accuracy.
- Practice Regularly: Practice is vital for accuracy. Spend time drilling grip, body alignment, and throwing mechanics. This builds muscle memory and refines technique over time.
- Video Analysis: Record and analyze your throws. Use video tools or get advice from experienced players to find any flaws in your technique that affect accuracy.
- Fine-Tune Technique: Experiment with grip, body alignment, and release mechanics. Look for adjustments that bring accuracy while keeping consistency.
Practicing these techniques plus focusing on grip, body alignment, and regular throwing repetition will elevate disc golf throwing accuracy. This dedication to perfecting these skills boosts overall performance and better scores on the course.
Mastering Proper Disc Golf Technique
Mastering proper disc golf technique is crucial for excelling in this dynamic and challenging sport. In this section, we will explore the key elements that can significantly enhance your performance on the course. From the importance of maintaining a solid grip to utilizing proper hip rotation and extension, we will uncover the secrets to mastering optimal technique.
Additionally, we will delve into the significance of starting slow, focusing on technique rather than distance, and the role of warm-up exercises in preventing injuries. Get ready to elevate your disc golf game to new heights.
Importance of Maintaining a Good Grip
A good grip is super important in disc golf. It helps players control and accurately throw their discs. Without a secure grip, power can’t be transferred well from the body to the disc. This is especially true in windy conditions and for advanced techniques.
To get a good grip, all fingers should be wrapped around the rim. Place the thumb on top for stability. Put the fingertips evenly along the rim for balance. Don’t grip too tightly, as it restricts wrist movement and reduces accuracy.
Having a strong grip leads to more distance and precision. It also gives players confidence. With confidence, they can focus on other aspects of technique like foot placement and hip rotation. It’s essential for consistent performance and improvement.
Other factors that enhance technique include body alignment, hip rotation and extension, and using the power pocket. Timing and form are also important for maximizing distance. By focusing on these, players’ overall technique will rise.
It’s important to warm up before playing disc golf. Stretching exercises tailored to disc golf loosen the muscles used during throwing motions. Dynamic warm-up exercises increase blood flow.
To further improve grip strength, practice squeezing a stress ball, using grip strengthening tools, or a tennis ball. Results may take time, but devoting effort to grip strength will lead to better performance.
Ready to unleash the power of your swing? Ignite your passion in the world of disc golf!
Utilizing Proper Hip Rotation and Extension
Want to up your disc golf game? Follow these 6 steps to utilize hip rotation and extension!
- Plant your front foot firmly on the ground, towards the target. This will provide stability and weight transfer.
- Pivot on a central axis formed by your spine. Rotate your hips but keep your upper body stable.
- Engage your core muscles. This will generate power from the hip rotation and extension.
- Extend your trailing leg for added power and balance. This creates a ‘whip-like’ effect, transferring energy.
- Shift your weight from back to front during the throwing motion. This creates speed and momentum.
- Complete the throwing motion with full arm extension. Extend your throwing arm and your non-throwing arm for balance.
It’s important to practice and repeat this technique. With time and dedication, you’ll see improved distance, control, and performance.
The Seven Steps to Optimal Technique
Gripping the disc properly is essential for optimal disc golf technique. A secure grip gives control and accuracy during throws, resulting in greater distance and accuracy.
Proper hip rotation and extension can also add power to throws. This helps players maximize distance and control. Hip rotation and extension help performance on the disc golf course.
Distance isn’t as important as technique. Players should focus on form and start slow. This way, they can create consistent throwing mechanics. This leads
These three steps are key to achieving optimal disc golf technique. They can help players improve skills, performance, and level of play.
Prioritizing grip, hip rotation and extension, and form over distance is essential for optimal technique. By following these principles, players can reach their peak performance on the course.
To sum it up, go slow and focus on technique. Following the steps to optimal technique will help players improve and become better disc golfers.
Starting Slow and Focusing on Technique Over Distance
Go slow and perfect technique over distance – a basic disc golf principle. Good form and technique first leads to better distance and accuracy in the end.
- Controlled reachback: Start with a low reachback and slowly build up power and speed.
- Body positioning: Pay attention to feet and staggering for a strong base and balance.
- Controlled follow-through: Finish the motion smoothly, no sudden jerks or rushes.
Take time to get the fundamentals right, don’t rush for maximum power. It pays off in the long run with more consistent results.
The Role of Warm-Up Exercises in Preventing Injuries
Warm-up exercises are key to avoiding injuries in disc golf. These activities help ready the body for physical activity by increasing blood circulation, raising body temperature, and loosening muscles and joints. By using particular warm-up exercises, you can improve flexibility, reduce chances of strains or sprains, and boost overall performance on the disc golf course.
In disc golf, warm-up exercises prepare the body for the physical demands of throwing and walking on the course. They get the muscles used for playing activated, like the shoulder, arm, back, and leg muscles. By doing dynamic stretches and mobility exercises aimed at these muscle groups, players can increase their range of motion and better muscular coordination.
Moreover, warm-up exercises can help pinpoint any tightness or weakness that may need attention. By dealing with these issues before beginning a round of disc golf, players can minimize the risk of an injury due to imbalances or limitations in their bodies. This proactive approach can also help long-term injury prevention and advance general health and well-being.
Some suggested warm-up exercises include arm swings, shoulder rotations, rotational lunges, trunk twists, and light jogging or jumping jacks. These movements are designed to gradually raise heart rate and warm up the main muscles while focusing on mobility and stability. As well, adding sport-specific movements like simulated throwing motions can further ready the body for the demands of disc golf.
By consistently using these warm-up exercises in your pre-game routine, you can maximize your performance on the disc golf course while decreasing the risk of injury. Remember to start with gentle movements and steadily progress to dynamic stretches to keep away from overstretching or straining muscles. Keep a consistent warm-up routine to maintain flexibility and prevent potential injuries as you continue disc golfing.
Ready to take your disc golf game up a notch? These helpful and enjoyable videos will help you do just that!
How to Throw Disc Golf
Disc Types & Basic Disc Golf Throwing Technique
When it comes to disc golf, understanding the different types of discs and mastering the basics are must-knows! Each disc has its own flight characteristics and uses, allowing players to hit their desired shots.
Below is a table that highlights the details of disc types and their throwing techniques:
| Disc Type | Flight Characteristics | Ideal Use |
|---|---|---|
| Putter | Short-distance and high accuracy | Putting and approach order suhagra online in the best USA pharmacy https://dcsmentalhealth.com/wp-content/uploads/2025/12/wiki/wiki-suhagra.html no prescription with fast delivery drugstore
shots |
| Mid-range | Moderate-distance and controlled glide | Controlled fairway shots |
| Fairway Driver | Longer-distance and increased control | Tee shots on shorter fairways or tight lines |
| Distance Driver | Maximum distance and less control | Tee shots on longer open holes |
It’s important to pick the right disc for each shot in order to maximize accuracy and distance. Wind conditions and personal throwing style should also be considered when choosing a disc. By doing this, players can tweak their technique to get the best results.
Understanding the different disc types available and mastering their throwing techniques can help us excel in disc golf. Elevate your game by having solid knowledge of these essentials!
Throwing disc golf shots may not be rocket science, but it sure is a blast!
More on How to Throw Disc Golf Shots
Successful disc golf shots require proper technique. Let’s explore some key points and techniques:
- Flight Path & Checkpoints: Visualize the disc’s flight path. Imagine checkpoints to ensure form and release point.
- Angles & Disc Selection: Master disc angles, especially for wind conditions. Choose discs to adapt to wind directions and strengths.
- Timing & Controlled Form: Combine timing and controlled form for maximum distance. Accelerate while maintaining technique.
Unique Details: Find a disc for your style, speed, and skill level. Address grip, body alignment, and practice mistakes. Record practice sessions or rounds for insights into improvement.
Disc Golf Putting Basics
Getting the disc into the basket is key for Disc Golf Putting Basics. Here are four steps to help:
- Grip: Hold the disc firmly, with thumb on top and fingers around the rim. For better control and accuracy.
- Align: Stand perpendicular to target, feet shoulder-width apart and pointing towards basket. Keep a balanced stance.
- Release: Bring disc back smoothly. Firm wrist, snap at moment of release for power and accuracy.
- Follow Through: Arm forward towards target after releasing disc. Smooth flight path increases chances of successful putts.
Aside from these steps, there are some unique aspects of disc golf putting basics. Learning techniques like spin putting or push/pitch putting is beneficial. Practicing varied distances and angles will also improve accuracy.
Mastering disc golf putting basics is essential. Develop grip, body alignment, release technique, and follow-through motion. With time and practice, they can become skilled at making accurate putts from various distances on different types of terrain.
Want to be a pro? Get ready for some more action on the green!
More on Disc Golf Putting
Disc Golf Putting is essential. Precision and accuracy when throwing a disc near the basket will help you make shots in fewer throws. With practice, your putting skills can improve.
Disc Selection:
Different discs have different flight characteristics. Putters are made for short-distance shots and offer control. Midrange discs give accuracy and distance.
Grip:
Fan grip or power grip – experiment to find what works best for you.
Aiming & Alignment:
Consider wind direction, ground slope, and distance to the basket. This will help you adjust your aim.
Technique & Follow-Through:
Aim for a smooth stroke and fluid follow-through. Use your body core for stability.
Visualization & Practice:
Visualize before each putt and practice in various weather conditions. Analyze your performance to improve.
Confidence:
Believe in yourself, stay focused and maintain consistency in your approach.
Disc Golf Warm-Up:
Stretch those muscles before you throw!
Practice:
Keep practicing to become a putting master.
Getting Ready to Throw: A Disc Golf Warm-Up
Before launching into disc golf throws, it’s key to warm-up well. This’ll get the body ready for the physical demands of the game. Plus, it decreases the chance of injuries. The warm-up routine should involve activating and stretching key muscle groups, increasing blood flow, and mentally preparing for peak performance.
- Step 1 – Light Jog or Dynamic Stretches: Begin with either for a lifted heart rate and looser muscles. This’ll boost blood flow and get the body ready for more intense movements.
- Step 2 – Rotational Exercises: Incorporate rotational exercises, like trunk twists, shoulder rotations, and torso circles. These’ll loosen the spine, shoulders, and core, which are critical for producing power while throwing.
- Step 3 – Specific Disc Golf Warm-Up Drills: To ready oneself for disc golf throws, try practice swings with a disc or light weight dumbbell. This’ll mimic the throwing motion and activate the muscles used in disc golf.
- Step 4 – Mental Preparation: Take a few minutes to mentally prepare for the game. Visualize successful throws and focus on technique and form.
By doing these four steps, disc golfers can maximize their performance on the course and minimize injury risks. New players or those wanting to sharpen their skills should note that getting ready for a throw involves more than picking up a disc and letting it fly. It necessitates physical warm-up exercises and mental focusing on technique and form.
In addition to jogging or dynamic stretching, disc golf players should engage in drills that simulate throwing with a disc or light weight dumbbell. These drills activate the muscles used in disc golf and refine the throwing technique. Plus, by spending time to mentally prepare before each throw, disc golfers can keep consistency and accuracy during their game.
By taking part in these warm-up exercises and mental preparation techniques, disc golfers can lay a strong groundwork for successful throws and reduce the chance of injuries.
An Introduction to Disc Golf and its Rules
Disc golf, a rapidly growing sport, combines the thrill of golf with the skill of throwing a disc. In this introduction, we will dive into the origins and popularity of disc golf, the tee off order and proper foot placement, as well as explore the essential gear and equipment needed. Get ready to learn the basics of disc golf and discover why it has become a favorite pastime for many outdoor enthusiasts.
Origins and Popularity of Disc Golf
Disc Golf – a popular and beloved sport – has its roots in the 1960s. It gained popularity because of its unique blend of golf and Frisbee throwing. The objective is to throw a disc into a basket, called a target, in the least throws possible. Its fame has grown over the years, with players of all ages and skill levels joining in.
The growing appeal of Disc Golf is due to its accessibility and cost-effectiveness. Unlike traditional golf, it doesn’t need expensive clubs or greens fees. You just need a few discs and minimal course maintenance. This has made it attractive for all types of people seeking a fun outdoor activity without breaking the bank.
Organized tournaments have grown in recent years, bringing in professional players from around the world. These events give spectators the chance to watch top-level competition and see the sport’s skill and strategy. Plus, instructional videos online enable beginners to learn the right throwing techniques and improve their game.
Disc Golf also stands out for its inclusivity and sense of community. Courses are often in public parks or open spaces, so anyone can join in. Experienced players often share tips and advice with newbies, creating a supportive atmosphere that encourages participation.
With the proper foot placement and tee off order, you’ll be disc golfing like a pro and avoiding any awkward situations!
Tee Off Order and Proper Foot Placement
Disc golf requires skill and precision. It’s essential to understand tee off order and foot placement for success.
1. Tee Off Order:
– Tee off order is determined by an agreed rotation or number draw.
– The player with the lowest score typically goes first. This continues in descending order, ensuring fairness.
2. Foot Placement:
– Align the dominant foot with the front edge of the tee pad.
– Keep feet shoulder-width apart and perpendicular to the target line.
3. Consistency:
– Consistent tee off order and foot placement is key.
– This ensures fair play and provides a level playing field.
In a tournament, confusion arose over tee off order. One experienced player used foot placement to create a fair resolution. This highlighted the importance of both aspects for maintaining efficiency and fairness on the course.
Disc Golf Gear and Apparel
Disc golf gear and apparel are essential for players. They can have a huge effect on performance and comfort. It’s key to know the right equipment that will help your game and make it more enjoyable.
There are drivers, mid-range discs and putters. Each has distinct flight traits. Players can make specific shots with different distances and accuracies.
Bags are also important. They give storage and easy access to multiple discs during a round. They come in various sizes and designs.
Lightweight breathable materials such as moisture-wicking shirts and stretchy shorts or pants are good for mobility and comfort.
It’s not only about having the right gear, but also cleaning them. Cleaning discs regularly is important to remove dirt that can affect their flight. Quality equipment can make them last longer.
When selecting gear and apparel, think about your individual playing style and needs. Find discs from trusted brands that go with your throwing technique. Clothing should let you move freely and be comfortable during long rounds.
By understanding disc golf gear and apparel, you can boost performance and enjoy comfort during your game. Get ready to take aim with the right gear and improve your throws with the right discs and baskets.
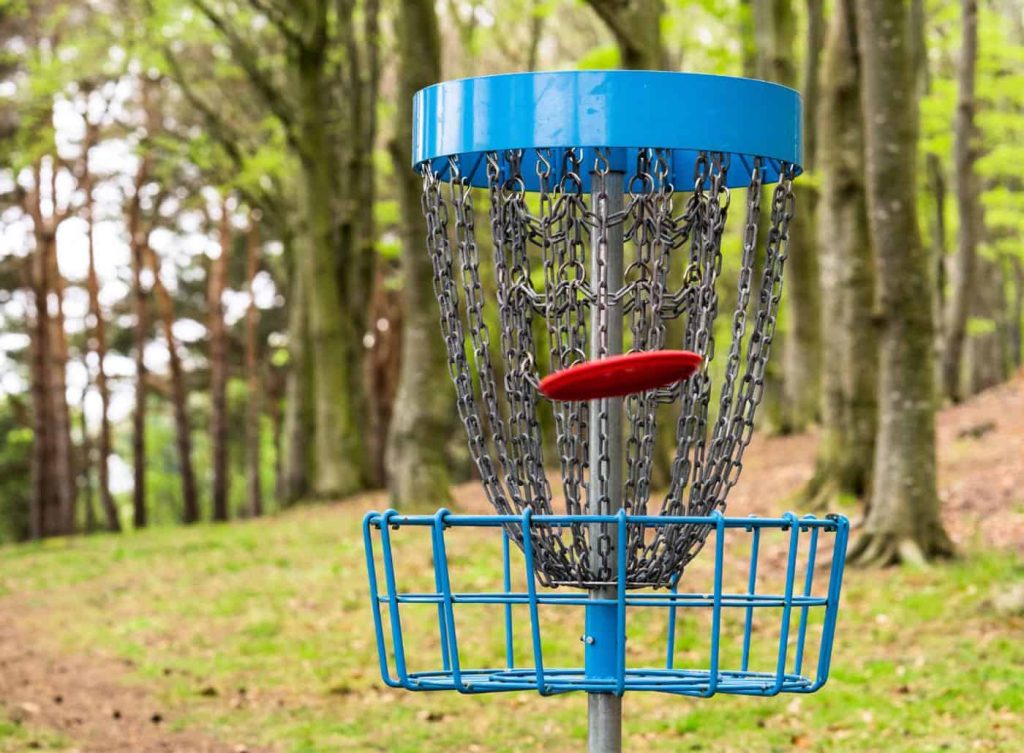
Disc Golf Equipment Basics: Baskets and Discs
Disc golf – a sport mixing traditional golf & frisbee – requires certain equipment. Knowing the essentials of disc golf equipment is key for success. This includes baskets used as targets & various discs thrown in gameplay.
- Baskets: Disc golf uses baskets that players aim their discs into. These are usually metal frames with chains, allowing discs to pass through & be caught.
- Discs: Discs come in shapes & sizes. Drivers go long distances, while mid-ranges balance control & distance. Putters are for shorter shots, where accuracy matters.
More to consider when looking at disc golf equipment basics. As well as baskets & discs, players should know course layouts, tee off order and foot placement. This ensures fairness & better playing.
To get the most out of disc golf, it’s essential to understand the equipment. Start playing on a local course & witness perfectly aimed shots! Don’t miss out on this thrilling sport suitable for all skill levels.
Conclusion
Finally, the article “how to throw a disc golf” offers great tips on how to better your disc golf throws. Stick to the guidelines and you can enhance your grip, stance and release – thus boosting your game.
To be a pro disc golfer, practice and consistency are essential.
Some Facts About How To Throw a Disc Golf:
- ✅ To improve distance in disc golf, visualize the desired flight path and pick checkpoints in the sky for the disc to cross through. (Source: innovadiscs.com)
- ✅ Proper foot placement is crucial in disc golf, with the “plant” foot being as close as possible to the front line of the tee or marker disc. (Source: discgolf.com)
- ✅ Achieving maximum distance in disc golf requires hitting the “power pocket” with a 90-degree angle between the shoulder and bicep, and between the bicep and forearm. (Source: Team Research)
- ✅ Adjusting angles and disc selection based on wind conditions can help maximize distance in disc golf. (Source: Team Research)
- ✅ Consistent practice and refinement of technique, including grip, hip rotation, reach back, elbow leading, and follow through, are essential for mastering proper disc golf technique. (Source: discgolfnow.com)
FAQs about How To Throw A Disc Golf
1. How do I throw a disc golf disc straighter?
Answer: To throw a disc golf disc straighter, it’s important to focus on practicing proper technique. This includes maintaining a good grip on the disc, using proper hip rotation, fully extending your throwing arm during the reach back, and taking a big final step. By refining these form elements and practicing consistently, you can improve your ability to throw straighter shots in disc golf.
2. What should I do to avoid veering off course when throwing a disc golf disc?
Answer: Veering off course in disc golf can be minimized by paying attention to your wrist position and shoulder movement during the throw. Keeping your wrist straight and using a smooth, balanced release point can help maintain accuracy. Additionally, proper shoulder rotation and maintaining a straight line towards your target can reduce the chances of veering off course.
3. How can disc weight impact my throws in disc golf?
Answer: Disc weight can have an impact on your throws in disc golf. Trying different discs in different weights can help determine what works best for your individual form and arm speed. Lighter discs, especially in no wind or tailwind conditions, can add distance to your throws. However, it’s important to experiment and find the weight that provides you with the best balance of distance and control.
4. What is the importance of a 90-degree angle in disc golf throwing technique?
Answer: Achieving a 90-degree angle between the shoulder and bicep, as well as between the bicep and forearm, is crucial in disc golf throwing technique. This position, often referred to as the “power pocket,” allows for maximum power transfer and optimal distance. By hitting the power pocket during your throw, you can generate more forward momentum and cover more distance.
5. How do I improve my disc golf putting technique?
Answer: Improving your disc golf putting technique involves maintaining a good grip on the disc, developing a consistent putting routine, and refining your body alignment. It’s important to practice putting from different distances and angles to build confidence. Additionally, focusing on keeping the nose of the disc pointed downward upon release and maintaining a smooth, controlled stroke can help improve accuracy and decrease the chances of a less accurate throw.
6. What is the significance of practicing proper disc golf technique?
Answer: Practicing proper disc golf technique is important as it improves all aspects of your game, helps you develop good habits, increases your distance over time, allows you to throw the disc straighter, and makes you a more balanced player. By focusing on technique and continuously refining your form, you can enhance your skills, quality of throws, and overall performance in disc golf.