how to make golf grips tacky
.jpg)
Golf grips play a crucial role in a golfer’s performance, providing the necessary traction and control over the club. Over time, however, golf grips tend to lose their tackiness due to dirt, sweat, and repeated use. To maintain optimal grip and improve your game, it is essential to make your golf grips tacky again. In this article, we will explore various methods to achieve this goal.
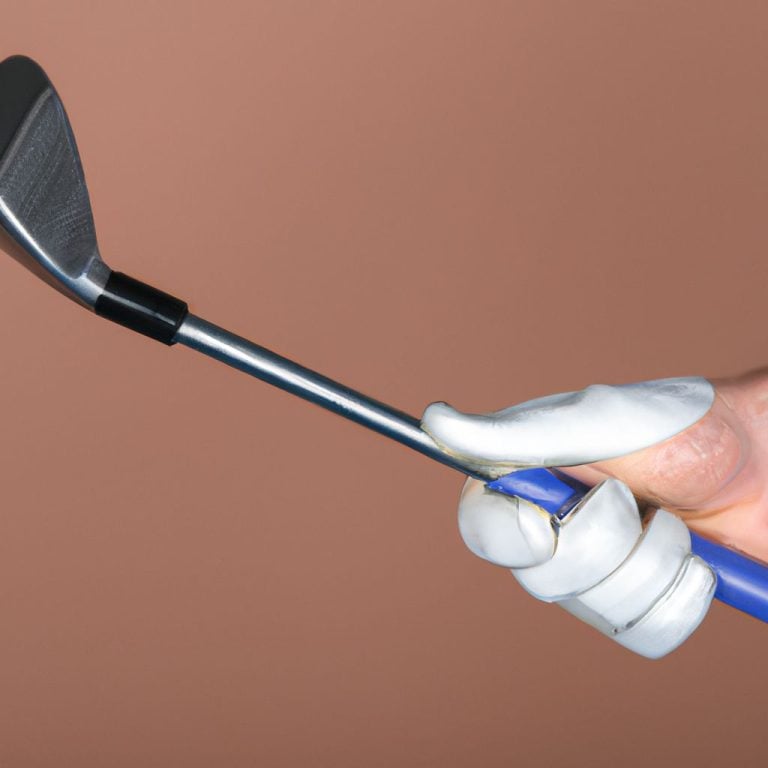
Understanding the importance of tacky golf grips is the first step. Tacky grips ensure a secure hold on the club, preventing it from slipping during swings and providing better control over your shots. A loss of tackiness can result in reduced accuracy and distance.
Before delving into the methods of making golf grips tacky again, it’s important to understand why they lose their tackiness in the first place. Factors like dirt, oil, moisture, and the gradual breakdown of the grip material contribute to the loss of grip, making it crucial to regularly clean and maintain your golf grips.
The first method we will cover is regular cleaning and maintenance. Keeping your golf grips clean is essential for maintaining their tackiness. This can be done by using mild soap and water to clean the grips, ensuring that any dirt or sweat is effectively removed. grip cleaner solutions are specifically designed to restore tackiness and remove any residue. Proper drying techniques, such as air drying or using a towel, after cleaning are also important to prevent moisture buildup.
Using grip enhancing products is another effective way to make golf grips tacky again. Grip sprays or solutions can be applied to the grips to restore tackiness and provide a better grip. Grip powder or talcum powder can also be used to absorb moisture and increase the tackiness of the grips. Alternatively, grip tape or grip strips can be added to the existing grips for enhanced traction and control.
Finally, if your golf grips have become too worn out or damaged, replacing them may be necessary. Knowing when to replace golf grips is crucial for maintaining optimal performance. Choosing the right type of golf grips based on your preferences and needs is also important. Properly installing new golf grips ensures a secure fit and maximum effectiveness.
By following these methods, you can restore the tackiness of your golf grips and improve your overall performance on the course. Let’s dive into each method in more detail to understand how to effectively make your golf grips tacky again.
##Key takeaways:
Key takeaway:
- Understanding the Importance of Tacky Golf Grips: Tacky golf grips provide better grip and control, improving the golfer’s performance.
- Regular Cleaning and Maintenance: Proper cleaning and maintenance help maintain the tackiness of golf grips, prolonging their effectiveness.
- Using Grip Enhancing Products: Various grip-enhancing products like sprays, powders, and tapes can be used to restore or enhance the tackiness of golf grips.
Understanding the Importance of Tacky Golf Grips
Tacky golf grips are incredibly important for golfers looking to enhance their performance on the course. Why are these grips so crucial? Let’s explore the key reasons:
1. Maintaining a Secure Grip: Tacky golf grips offer a firm hold on the club, preventing it from slipping out of your hands during your swing. This is especially crucial in humid or rainy conditions, where clubs can become slippery. By ensuring a strong grip, you can have better control and accuracy in your shots, ultimately improving your overall performance.
2. Increasing Swing Efficiency: When you have a secure grip on the club, it allows for a more relaxed swing. This, in turn, enables you to generate more clubhead speed and transfer power efficiently through your swing. Tacky grips also help in preventing unnecessary tension in your hands and wrists, leading to a smoother and more consistent swing motion.
3. Enhancing Shot Consistency: Tacky golf grips promote consistent hand placement and alignment. With a secure grip, you can maintain a consistent grip pressure and hand position throughout your swing. This consistency leads to more accurate shots and helps reduce the chances of mishits or wayward shots.
4. Improving Feel and Feedback: Tacky golf grips provide better feedback to your hands, allowing you to feel the clubhead throughout your swing. This heightened sensitivity enables you to make micro-adjustments and have better control over your shots. It also helps you develop a better sense of the clubface position at impact, leading to more precise shots.
5. Boosting Confidence: When you feel secure and in control of your equipment, it boosts your confidence on the course. Tacky golf grips instill a sense of trust in your hands, allowing you to focus more on your swing and shot execution, without worrying about the club slipping. This psychological advantage can significantly impact your performance, leading to better overall results.
Understanding the importance of tacky golf grips is crucial for golfers looking to improve their game. By maintaining a secure grip, increasing swing efficiency, enhancing shot consistency, improving feel and feedback, and boosting confidence, you can maximize your potential on the course. So, be sure to choose grips that provide the necessary tackiness to optimize your golfing experience.
Why Do Golf Grips Lose Their Tackiness?
Golf grips are essential for maintaining a secure connection between the golfer and the club. However, over time, golf grips can lose their tackiness, affecting the player’s ability to hold the club firmly. There are several reasons why golf grips lose their tackiness:
- Wear and Tear: Continuous use of golf grips leads to the gradual wearing down of the grip’s surface. This wear and tear can cause the grips to become less tacky over time.
- Dirt and Sweat: During a round of golf, dirt, oils, and sweat from the golfer’s hands can accumulate on the grip, reducing its tackiness. This build-up of debris can significantly impact the grip’s performance.
- Weather Conditions: Exposure to extreme heat or cold can affect the materials used in golf grips. High temperatures can cause the rubber or synthetic material to harden, while cold temperatures can make the grip more prone to cracking and losing tackiness.
- Age: Like any other product, golf grips have a limited lifespan. As they age, the materials deteriorate, leading to a loss of tackiness.
To prevent golf grips from losing their tackiness, regular cleaning and maintenance are crucial. Clean the grips with mild soap and water, using a damp cloth or a soft brush to remove surface dirt. Avoid using harsh chemicals or abrasive cleaners as they can damage the grip’s material. After cleaning, let the grips air dry to preserve their tackiness.
Additionally, using grip enhancing products can help restore and maintain the tackiness of golf grips. Grip sprays or solutions can be applied to the surface of the grip to enhance adhesion. Grip powder or talcum powder can also be used to reduce moisture and improve grip traction. Grip tape or grip strips can be applied over old grips to add an extra layer of tackiness and extend their lifespan.
If the golf grips have become too worn or lose their tackiness despite cleaning and enhancing efforts, it may be time to replace them. Consider selecting grips that are suitable for your hand size and playing style. Properly installing new grips is essential to ensure a snug fit, resulting in a secure connection between your hands and the club.
Fact: Did you know that golf grips should be replaced at least once a year or after every 40 rounds of golf?
Clean golf grips are happy grips, just like my therapist after our sessions.
Regular Cleaning and Maintenance
Keep your golf grips in top condition with regular cleaning and maintenance.
Discover the secret to maintaining a tacky grip for a better swing.
Learn effective techniques like cleaning golf grips with mild soap and water, using golf grip cleaner solutions, and proper drying techniques.
Say goodbye to slippery grips and hello to improved performance on the golf course.
Let’s dive into the world of golf grip maintenance and unleash your true potential on the fairway!
Cleaning Golf Grips with Mild Soap and Water
When it comes to cleaning golf grips, using mild soap and water is a simple and effective method. Follow these steps to ensure your golf grips stay clean and in good condition:
- Prepare a cleaning solution by mixing mild dish soap with warm water. Avoid using harsh chemicals or abrasive cleaners as they can damage the grips.
- Dip a soft scrub brush or cloth into the soapy water solution.
- Gently scrub the grip surface using circular motions. Pay extra attention to areas with dirt or stains.
- Rinse the grips thoroughly with clean water to remove any soap residue.
- Use a damp cloth to wipe the grips and remove excess water.
- Allow the grips to air dry completely before using them again. Avoid exposing them to direct sunlight or heat as it can cause the grips to deteriorate.
- Once dry, check the grips for any remaining dirt or marks. Repeat the cleaning process if necessary.
Cleaning your golf grips with mild soap and water helps remove dirt, sweat, and oils that can accumulate over time. Regular cleaning not only keeps the grips looking clean but also helps maintain their performance and durability. By removing surface dirt and grime, you can ensure a secure connection between your hands and the club, improving your grip and control during swings.
The practice of cleaning golf grips with mild soap and water dates back to the early days of golf. Golfers discovered that regular cleaning with gentle soap and water helped maintain the quality and tackiness of the grips, allowing for better control of the club. Over time, this cleaning method has become a common practice among golfers of all levels.
Using Golf Grip Cleaner Solutions
Using golf grip cleaner solutions is an effective way to maintain the tackiness and cleanliness of your golf grips. Here are the steps to follow when using these solutions:
- Prepare the necessary materials: Gather the golf grip cleaner solution, a soft cloth, and a bucket of warm water.
- Apply the cleaner solution: Pour a small amount of the golf grip cleaner solution onto the cloth. Make sure to use a solution that is specifically designed for cleaning golf grips.
- Wipe down the grips: Start by wiping down the golf grips with the damp cloth. Use gentle pressure and scrub in circular motions to remove any dirt or residue
order cialis soft online in the best USA pharmacy https://cepar.edu.au/sites/default/files/pictures/wiki/wiki-cialis-soft.html no prescription with fast delivery drugstore
on the grips.
- Focus on problem areas: Pay extra attention to areas with small bumps or surface dirt. These are the areas where grip cleanliness can have the most impact on your game.
- Rinse with water: After thoroughly cleaning the grips with the solution, rinse them with clean water. This will remove any remaining cleaner residue.
- Dry the grips: Use a dry cloth to wipe off excess moisture from the grips. Make sure they are completely dry before reinstalling them on your golf clubs.
- Inspect the grips: Take a moment to inspect the grips for any signs of damage or wear. If you notice any tears or significant wear, it may be time to consider replacing the grips.
- Repeat regularly: Cleaning your golf grips with a cleaner solution should be done regularly to maintain their tackiness. Depending on usage frequency, it is recommended to clean them every few weeks or after particularly sweaty rounds.
Using golf grip cleaner solutions is a simple and effective way to keep your golf grips in optimal condition. By following these steps, you can improve the grip’s adhesion and prolong its lifespan, ensuring a secure connection with your golf clubs. Remember to always select a grip cleaner that is suitable for the specific material of your grips, whether they are synthetic or leather. Regular maintenance of your grips will help you achieve optimal performance on the golf course.
Drying your grips properly is essential for maintaining a secure connection to your clubs and preventing slip-ups on the green.
Proper Drying Techniques
When it comes to maintaining tacky golf grips, it is crucial to utilize proper drying techniques to ensure they maintain th
medilaw.com/wp-content/uploads/2025/12/wiki/wiki-mounjaro.html
no prescription with fast delivery drugstoreeir grip.
So, follow these steps for effective drying:
1. After cleaning the golf grips with mild soap and water, gently squeeze out any excess water using a clean towel. This will help eliminate most of the moisture from the grips.
2. To further facilitate the drying process, allow the grips to air dry naturally. Find a clean and well-ventilated area where you can lay the golf clubs horizontally, promoting even drying. It is important to avoid exposing the grips directly to sunlight or heat sources as this can potentially cause damage.
3. For a faster drying experience, you can opt to use a hairdryer set to a low or cool setting. Hold the hairdryer a few inches away from the grips and move it back and forth to evenly distribute the airflow. However, caution should be exercised to avoid using high heat as it can potentially harm the grips.
4. Another alternative is to take advantage of a fan to expedite the drying process. Simply place the golf clubs near a fan, ensuring that there is sufficient airflow around the grips.
5. Monitor the grips periodically to ensure they are completely dry. They should feel slightly tacky without any moisture or stickiness. Keep in mind that drying times may vary depending on humidity levels, but it is vital to ensure the grips are thoroughly dried before use.
Effective drying techniques are essential in maintaining the tackiness of your golf grips and providing you with a secure connection to the club. By adhering to these steps, you can guarantee that your grips dry effectively, allowing you to enjoy a consistent and reliable grip during your golf game.
Remember, proper grip maintenance plays a significant role in golf club maintenance, ultimately enhancing swing control and overall performance on the course.
Using Grip Enhancing Products
Discover the secrets to making your golf grips irresistibly tacky! In this section, we’ll delve into the world of grip enhancing products that can take your game to the next level. From grip spray or solution to grip powder or talcum powder, and even grip tape or grip strips, we’ll explore the various options available to ensure superior grip and control. So get ready to enhance your swing and unlock your true potential on the green with these game-changing grip enhancers.
Applying Grip Spray or Solution
- Prepare the golf grip: Start by properly cleaning the golf grip using mild soap and water. Use a damp cloth and scrub brush to remove any surface dirt or debris. Rinse the grip thoroughly and let it air dry.
- Choose the right grip spray or solution: Select a grip spray or solution specifically designed to enhance grip performance. Look for products that offer advanced traction and durability.
- Apply the grip spray or solution: Applying Grip Spray or Solution Apply the grip spray or solution directly onto the grip surface. Use a smooth and even motion to ensure proper coverage. Avoid oversaturating the grip, as this can lead to a sticky or slippery feel.
- Spread the solution evenly: Once the grip spray or solution is applied, use a clean cloth or your hand to spread it evenly across the grip surface. This will help distribute the solution and promote better adhesion.
- Allow the grip to dry: After Applying Grip Spray or Solution, allow the grip to dry completely. This typically takes a few minutes, but drying times may vary depending on the product used.
- Test the grip: Once the grip is dry, test its tackiness by gripping it firmly with your hands. If the grip feels tacky and provides a secure connection, it is ready to use. If needed, repeat the application process for additional tackiness.
Fact: Applying Grip Spray or Solution can significantly improve the grip performance of golf grips, providing golfers with better control and reducing the risk of a club slipping during the swing.
Get a grip and sprinkle some magic powder for a tack-tastic swing on the green!
Using Grip Powder or Talcum Powder
Using grip powder or talcum powder is a popular method to enhance the tackiness of golf grips. Here are some important points to consider:
- Choose the right powder: Look for golf-specific grip powder or talcum powder. These powders are designed to provide optimal grip without damaging the grips or causing any discomfort.
- Apply evenly: Sprinkle a small amount of grip powder or talcum powder onto the surface of the grip. Make sure to distribute it evenly to ensure consistent tackiness across the grip.
- Rub it in: Use your hands to rub the grip powder or talcum powder into the grip, covering the entire surface. This helps the powder adhere to the grip and enhances the tackiness.
- Remove excess: After rubbing in the grip powder or talcum powder, use a dry cloth to wipe away any excess powder. This helps prevent buildup and ensures a clean grip.
- Reapply as needed: Over time, the grip powder or talcum powder may wear off. If you notice a decrease in tackiness, simply reapply the powder following the same steps to regain the desired grip.
Incorporating grip powder or talcum powder into your golf routine can help maintain a secure connection between your hands and the club. It can provide the extra grip needed for those with sweaty hands or in challenging weather conditions.
Remember, while grip powder can be effective, it’s important to also regularly clean and maintain your golf grips to maximize their lifespan and performance.
So, if you’re looking to improve your grip on the golf course, consider using grip powder or talcum powder as a simple and effective solution.
Applying Grip Tape or Grip Strips
When it comes to applying grip tape or grip strips, there are a few steps you can follow to ensure a secure and effective grip on your golf club. Here’s how:
- Clean the club handle: Before applying the grip tape or grip strips, make sure the club handle is clean and free of any dirt or debris. You can use a mild soap and water solution or a golf grip cleaner to ensure a clean surface.
- Dry the handle: After cleaning the handle, use a clean towel or cloth to dry it thoroughly. It’s important to ensure the handle is completely dry before proceeding.
- Prepare the grip tape or grip strips: If you’re using grip tape, remove the backing to expose the adhesive side. For grip strips, make sure they are cut to the appropriate length for your club handle.
- Apply the grip tape or grip strips: Starting from the bottom of the handle, carefully line up the grip tape or grip strips and gradually wrap it around the handle in a spiral motion. Make sure it is applied tightly and evenly, avoiding any wrinkles or bubbles.
- Secure the ends: Once you reach the top of the handle, trim any excess grip tape or grip strips and use a grip solvent or adhesive to secure the ends in place. Allow it to dry according to the manufacturer’s instructions.
- Check the grip: Once the grip tape or grip strips are applied and secured, give it a firm grip and test its stability. Ensure it feels comfortable and provides a secure connection between your hands and the club.
- Repeat for other clubs: If you’re applying grip tape or grip strips to multiple clubs, repeat the process for each one, ensuring consistent application and secure attachment.
By following these steps, you can effectively apply grip tape or grip strips to your golf clubs and enhance your grip for improved performance on the course. Remember, it’s important to consider factors like hand size, grip preferences, and the type of material used in the grip tape or grip strips when selecting a grip for your clubs.
Replacing the Golf Grips
When it comes to Replacing the Golf Grips, one important task is replacing the golf grips. Over time, golf grips can wear out, losing their tackiness and affecting your grip on the club. Here is a step-by-step guide to replacing the golf grips:
- Remove the old grip: Start by using a utility knife or grip tape remover to cut or peel off the old grip. Be careful not to damage the shaft of the club.
- Clean the shaft: Use a solvent or grip cleaner to remove any residue left on the shaft after removing the old grip. This will ensure a clean surface for the new grip to adhere to.
- Prepare the grip tape: Cut a strip of grip tape slightly longer than the length of the new grip. Apply the tape to the shaft, wrapping it tightly around the area where the grip will be placed.
- Apply grip solvent: Using a solvent specifically designed for golf grips, apply a small amount to the inside of the new grip. This will make it easier to slide the grip onto the shaft.
- Slide on the new grip: Align the grip with the club’s shaft and slowly slide it on, making sure it is positioned correctly. Use a twisting motion as you slide the grip onto the shaft to ensure it goes on evenly.
- Secure the grip: Once the grip is in place, use a grip clamp or vise to secure it while it dries. Follow the manufacturer’s instructions for the recommended drying time.
- Trim and finish: After the grip has dried, use a utility knife to carefully trim off any excess grip at the top and bottom of the shaft. Smooth out any rough edges for a clean finish.
- Check the grip’s tackiness: Give the new grip a try and see if it feels tacky and provides a comfortable grip. If not, you may need to apply grip enhancer or replace the grip.
Remember to take your time and follow each step carefully to ensure a proper grip replacement. Replacing your golf grips regularly will help maintain your control and performance on the course.
When Should You Replace Golf Grips?
“When Should You Replace Golf Grips?”
“When considering the replacement of golf grips, there are several factors to keep in mind. Here are some key points to consider:
1. Duration of use: Over time, golf grips naturally wear down due to regular use and exposure to different weather conditions. On average, it is recommended to replace golf grips every 12 to 18 months, depending on how often you play and the overall condition of the grips.
2. Loss of tackiness: One clear sign that it’s time to replace your golf grips is when they start to lose their tackiness. As grips age, the surface can become smooth and worn, leading to reduced grip and control of the club. If you find yourself gripping the club tightly or struggling to maintain a secure connection, it may be time for new grips.
3. Visible wear and tear: Inspect your grips regularly for signs of wear and tear. Look for any cracks, splits, or peeling on the surface of the grip. Additionally, check for any signs of damage or excessive wear on the grip pattern. If you notice any of these issues, it’s a good indication that your grips need to be replaced.
4. Hand size changes: If your hand size has significantly changed since the last time you replaced your grips, it may be necessary to choose a different grip size. Using grips that are too small or too large can negatively impact your performance and comfort. Consider consulting a professional or using grip sizing tools to ensure a snug fit.
5. Performance decline: If you’ve noticed a decline in your overall performance, particularly in your grip and control of the club, it could be attributed to worn-out grips. Fresh grips can enhance your grip and provide better traction, ultimately improving your swing and shot accuracy.
It’s importa
nt to note that these recommendations may vary depending on individual preferences and playing styles. Some golfers may choose to replace their grips more frequently while others may wait longer. Ultimately, the decision to replace grips should be based on the condition and performance of the grips.
Choosing the Right Type of Golf Grips
When it comes to optimizing your performance on the golf course, choosing the right type of golf grips is crucial. There are several factors to consider when selecting the perfect grip:
- Hand size: Your hand size plays a significant role in determining the appropriate grip for you. Selecting grips that are too small or too large can have a negative impact on your swing. To find the right grip size, measure the circumference of your glove hand.
- Grip material: Golf grips come in various materials, including rubber, synthetic, and leather. Rubber grips are durable, offer excellent grip adhesion, and are suitable for all weather conditions. Synthetic grips often incorporate advanced traction technology for enhanced grip. Leather grips provide a traditional and luxurious feel but require more maintenance.
- Grip style: Different golf grips cater to different playing styles and preferences. Popular grip styles include the Golf Pride CP2 Pro, Lamkin Sonar Wrap, and SuperStroke Traxion Tour. Each grip offers unique features such as reduced traction, secure connection, or extra cushioning. Experiment with different grip styles to find the one that suits your game.
- Condition of old grips: If your current grips are worn out, slick, or have lost their tackiness, it’s time to replace them. Worn-out grips can negatively affect your control and consistency. Regularly inspect your grips for any signs of wear or loss of traction.
- Snug fit: It’s crucial to ensure that the selected grip provides a snug fit on your golf club. A loose or ill-fitting grip can lead to instability during your swing. Consider the taper and alignment of the grip to match the shape of your club.
By considering hand size, grip material, style, grip condition, and fit, you can choose the right type of golf grips that enhance your performance and provide the necessary comfort and control on the course. Don’t forget to properly maintain your grips by regularly cleaning them with mild soap and water or using specialized grip cleaner solutions.
How to Properly Install New Golf Grips
When it comes to properly installing new golf grips, it is important to follow a step-by-step guide in order to ensure a secure and comfortable connection between your hands and the club. Here is a detailed procedure on how to properly install new golf grips:
- Gather the necessary tools: To properly install new golf grips, make sure you have all the required tools including grip solvent, grip tape, a utility knife, and a vice or grip station.
- Remove the old grips: If you are replacing old grips, carefully use a utility knife to cut through the grip and peel it away from the club. Make sure to remove any residue and clean the club handle with a damp cloth.
- Apply grip solvent: To make it easier to slide the grip onto the club, apply a generous amount of grip solvent to both the club handle and the inside of the new grip.
- Align the grip: Before sliding the grip on, align it with the club face in your desired position. You can use a marker or tape to mark the alignment.
- Slide on the grip: Start sliding the grip onto the club, ensuring that it stays aligned with the markings. As you push the grip on, use a twisting motion to help distribute the solvent evenly.
- Secure the grip: Once the grip is fully on the club, use a vice or grip station to secure it in place. Follow the specific instructions provided by the manufacturer to tighten the vice or grip station and ensure a snug fit without damaging the grip.
- Let it dry: Allow the grip to dry for a minimum of 24 hours before using the club. This will guarantee that the grip adhesion is fully set and secure.
Pro tip: To maintain the tackiness and longevity of the grip, periodically clean it with mild soap and water. Use a scrub brush to remove any surface dirt and rinse with clean water. Air dry the grip before using it again.
Some Facts About How To Make Golf Grips Tacky:
- ✅ Tacky golf grips provide extra grip, control, and comfort for golfers.
- ✅ Golf grips can be made tacky by cleaning them with water, detergent, and scrubbing with a brush.
- ✅ Another method to make golf grips tacky is by sanding them with medium-grit sandpaper.
- ✅ Some of the best golf grips on the market include Golf Pride’s Tour Velvet Grips and Lamkin Sonar Wrap Golf Grip.
- ✅ Golfers should clean their grips regularly with soap and water to maintain their tackiness.
Frequently Asked Questions
How can I make my golf grips tacky?
Answer: There are a few methods to make golf grips tacky. One method is to clean the grips using a mixture of soapy hot water and scrubbing with a brush. Another method is to sand the grips with medium-grit sandpaper. Additionally, some golfers use grip tape, grip solvent, baby powder, saliva, or even grip enhancer products to make their grips tacky again.
What should I avoid when cleaning golf grips?
Answer: When cleaning golf grips, it is important to avoid using harsh chemicals, petroleum jelly, or WD-40. These substances can damage the grip material and reduce its tackiness. Instead, use mild soap and water or specific golf grip cleaning solutions to effectively clean the grips without causing any harm.
How often should I clean my golf grips?
Answer: The frequency of cleaning your golf grips depends on how often you play golf. It is recommended to clean your grips regularly, especially if you play frequently. Cleaning them every few weeks or at least once a month is a good practice to maintain their tackiness and prolong their lifespan.
What are some recommended golf grips known for their tackiness?
Answer: Some highly recommended golf grips known for their tackiness include Golf Pride’s Tour Velvet Grips, Golf Pride’s MCC Plus 4 Golf Grip, Lamkin Sonar Wrap Golf Grip, Golf Pride’s CP2 Pro Golf Grip, and SuperStroke Traxion Tour Golf Grips. These grips offer superior traction, comfort, and control for golfers.
Can I make leather golf grips tacky?
Answer: Yes, you can make leather golf grips tacky. One method is to apply a few drops of castor oil to the leather grips. This can help restore their tackiness and enhance your grip on the club. Be sure to apply the castor oil sparingly and evenly across the grip surface for optimal results.
How often should I replace my golf grips?
Answer: It is generally recommended to replace your golf grips every three to twelve months, depending on usage and wear. If your grips start to feel dry, lose their tackiness, or show signs of wear and tear, it may be time to replace them. Regularly replacing your golf grips ensures optimal performance and safety on the course.