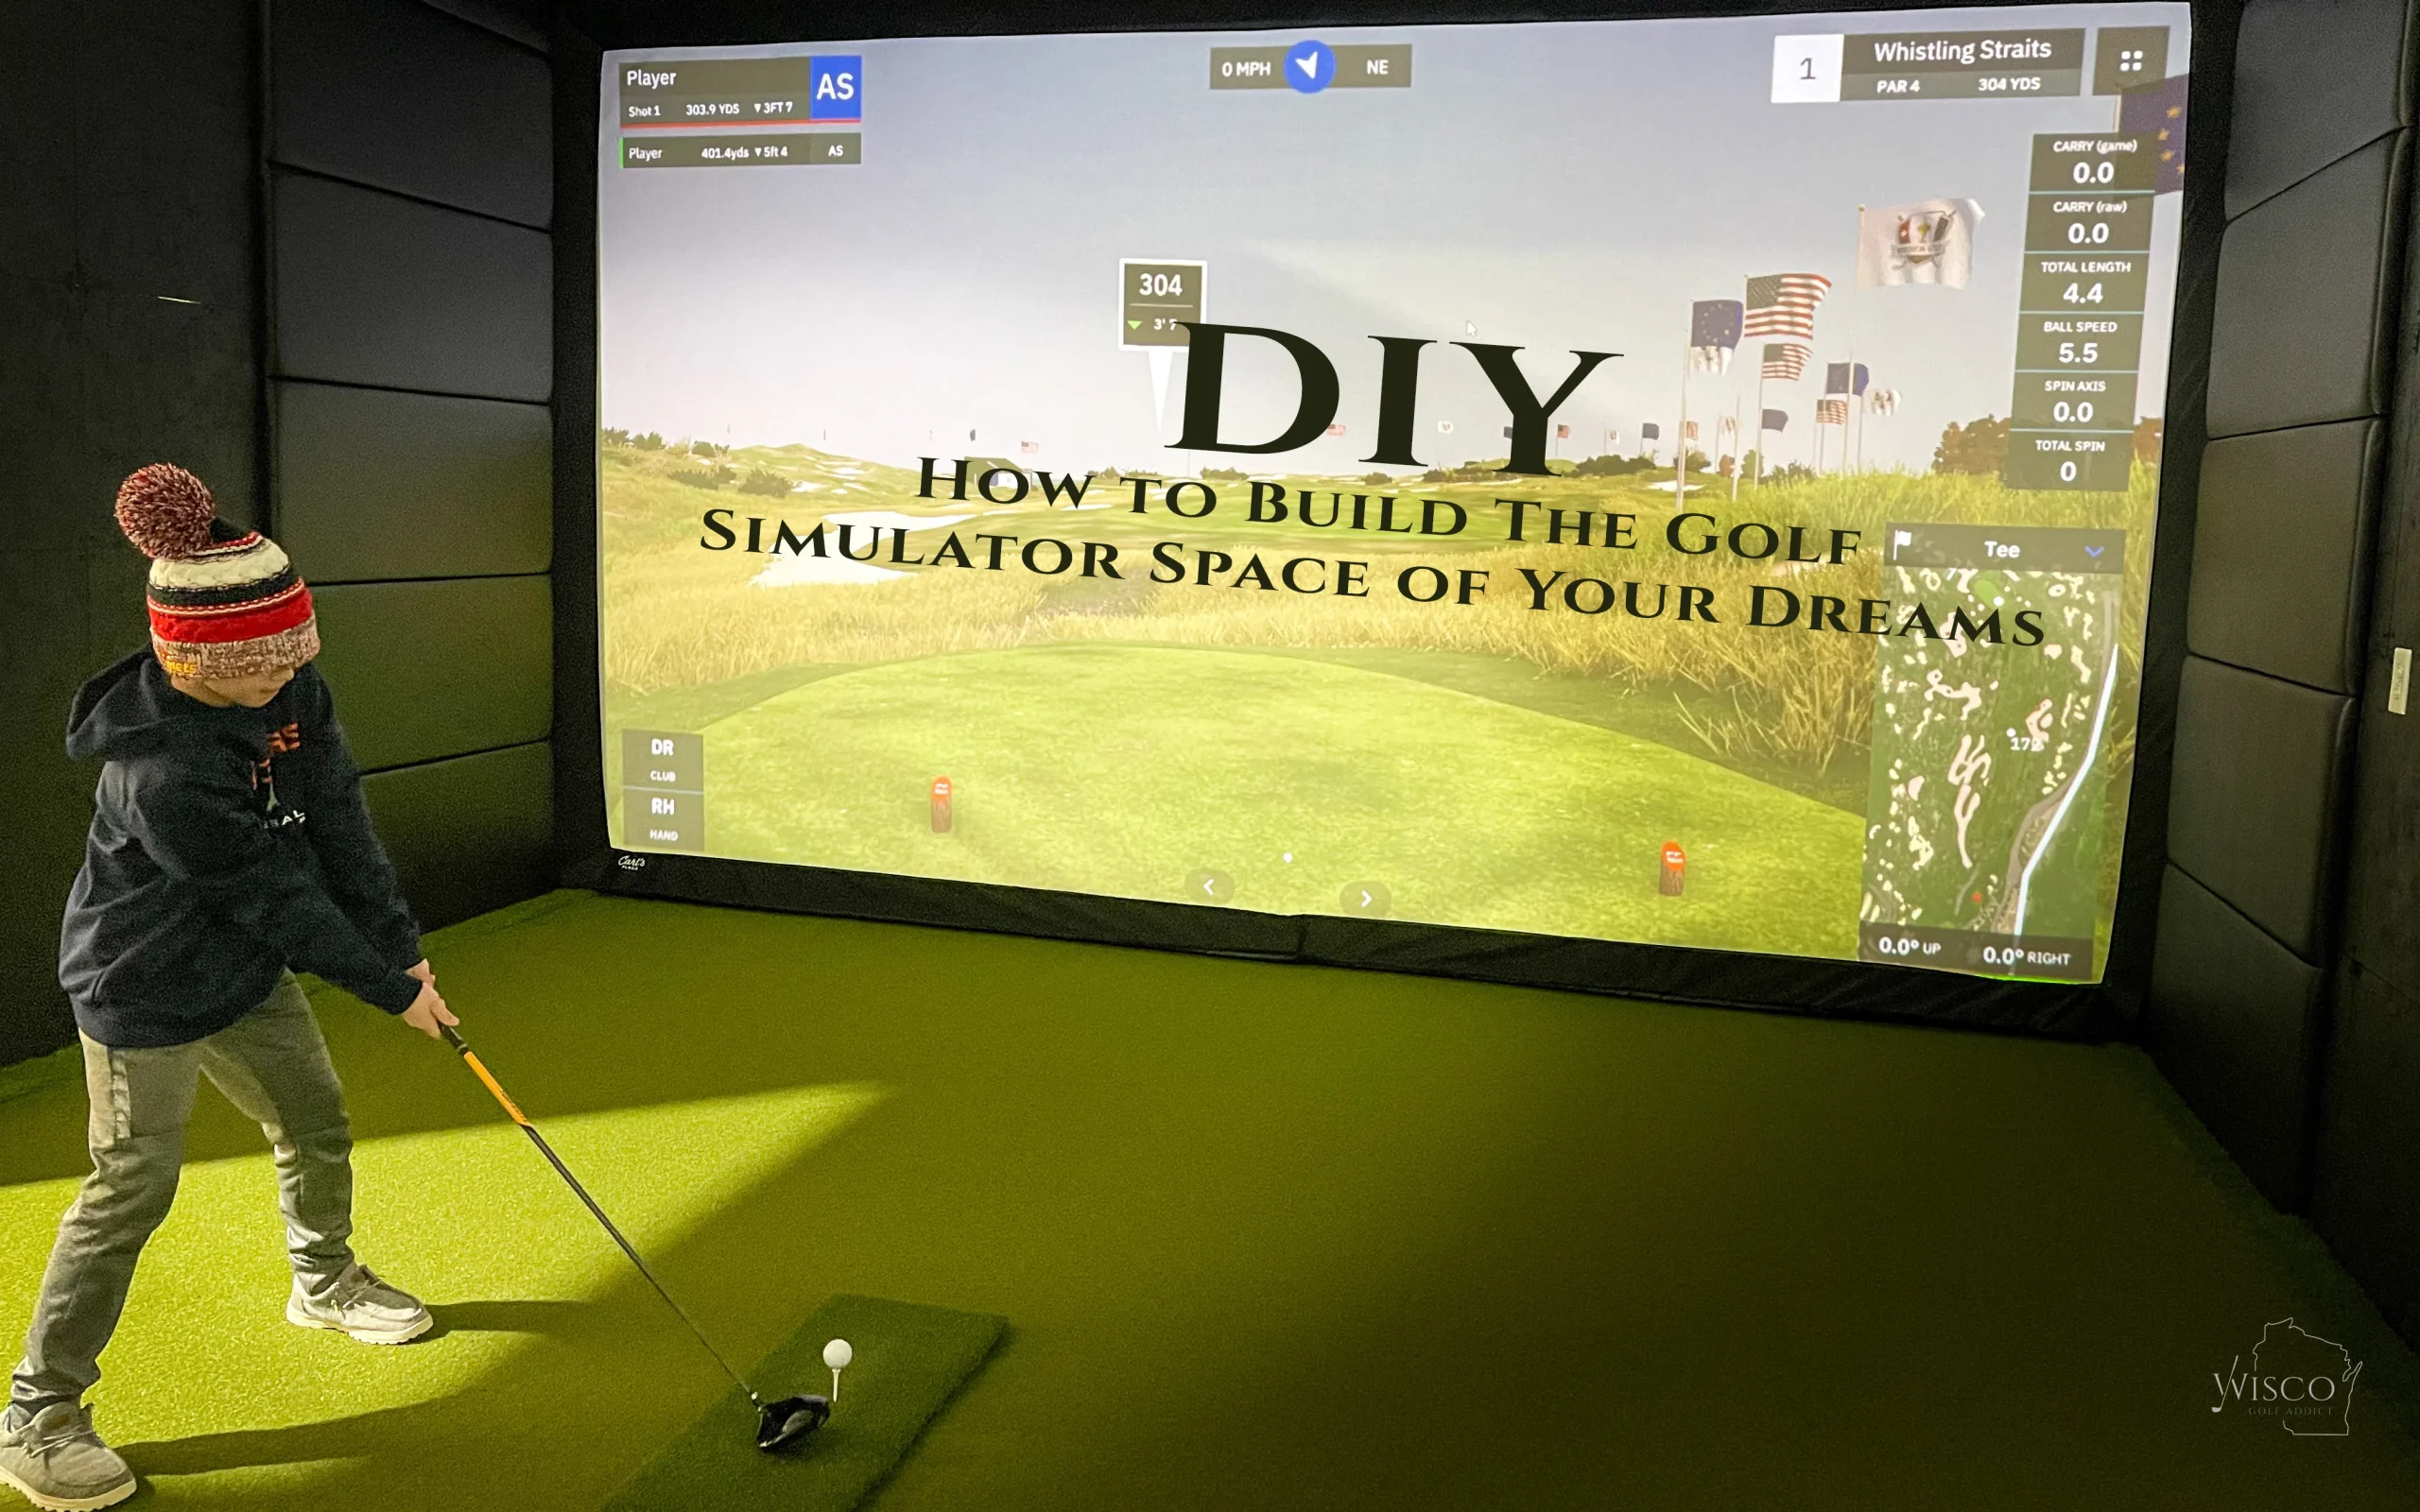
Teeing Off Indoors: How to Build a Golf Simulator
Building a golf simulator offers golf enthusiasts the opportunity to practice and enjoy the game from the comfort of their own home. A golf simulator recreates the experience of playing golf in a virtual environment, allowing players to improve their skills and enjoy the game regardless of weather conditions or time constraints.
Understanding the different aspects of building a golf simulator is essential for a successful setup. This article will provide a comprehensive guide on how to build a golf simulator, including the benefits, considerations before building, step-by-step instructions, and tips for using and maintaining the simulator. By the end of this article, readers will have a clear understanding of how to create their own golf simulator and enhance their golfing experience.
Punto clave:
- Golf simulators maximize space: By building a golf simulator, you can enjoy playing golf in the comfort of your own home without the need for a large outdoor space. This is particularly beneficial for individuals living in urban areas with limited space.
- Golf simulators provide a realistic experience: Golf simulators utilize advanced technology to accurately replicate the golfing experience. With realistic graphics, adjustable lighting, and calibrated sensors, you can enjoy an immersive and authentic golfing experience.
- Golf simulators offer convenience and cost savings: Building a golf simulator allows you to practice and play golf at any time, regardless of the weather conditions. Additionally, it eliminates the need for expensive golf course fees and travel expenses, making it a more affordable option in the long run.
What is a Golf Simulator?
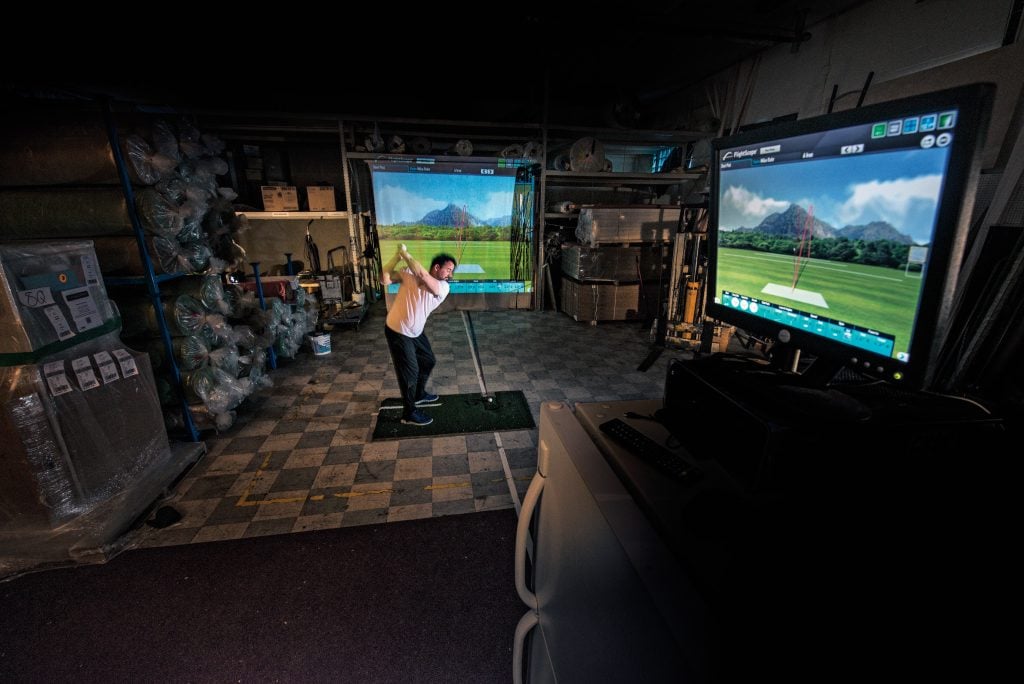
A golf simulator is an advanced technology that allows golfers to play and practice the game in an indoor setting. It provides a realistic golfing experience by simulating golf courses and recreating the game’s various aspects. Golf simulators are equipped with high-quality graphics, special sensors, and software that accurately measure and analyze the golfer’s swing and ball flight.
One important feature of a golf simulator is the projection screen or video screen where the virtual golf course is displayed. The image quality and resolution of the screen are crucial in providing a lifelike experience. High-definition screens with a wide view angle offer a more immersive and realistic golfing environment.
To enhance the realism, golf simulators also incorporate sensors and cameras to track the golfer’s swing. These sensors analyze the clubhead speed, angle of attack, and path of the swing, providing valuable feedback on the golfer’s technique. Some simulators even offer 3D imaging capabilities, allowing players to view their swing from different angles and analyze each movement in detail.
Golf simulators often come with various simulation software that offers different golf courses and game modes. Players can choose from famous courses around the world or compete in virtual tournaments. The software takes into account factors such as wind, weather conditions, and terrain, offering a realistic golfing experience.
Using a golf simulator has several advantages. It allows golfers to practice and improve their skills regardless of weather conditions and time of day. It also enables golfers to play on courses they may never have the opportunity to visit in real life. Additionally, the simulator provides instant feedback on swing performance, helping golfers identify areas for improvement.
Why Build a Golf Simulator?
Looking to take your golf game to the next level? Discover why building a golf simulator is becoming a popular choice among enthusiasts. Dive into the incredible benefits that come with having a personal golf simulator setup, and get ready to enhance your skills, improve your technique, and enjoy the game from the comfort of your home. Get the ultimate golfing experience with a simulator that brings the golf course right to you.
Benefits of Having a Golf Simulator
The benefits of having a golf simulator are numerous and can greatly enhance your golfing experience. Here are some of the key benefits:
- Conveniencia: One of the main advantages of a golf simulator is the convenience it offers. With a simulator, you can play golf anytime, regardless of the weather or time of day. You no longer have to worry about finding a golf course or booking tee times.
- Accessibility: Having a golf simulator at home allows you to practice your game without having to travel to a golf course. This is especially beneficial for individuals who live in areas where golf courses are scarce or expensive.
- Cost-Effective: While initially, the cost of setting up a golf simulator may seem high, it can save you money in the long run. Instead of spending money on green fees, driving range buckets, and other fees associated with playing golf, you can enjoy unlimited practice and play right at home.
- Game Improvement: A golf simulator provides advanced analytics and feedback on your swing and ball flight, allowing you to identify areas for improvement. With features like shot analysis, club fitting, and virtual courses, you can work on your game and track your progress over time.
- Entertainment: In addition to practicing and improving your skills, a golf simulator can also provide entertainment for friends and family. You can host virtual golf tournaments, play famous courses from around the world, and have fun competing against others.
- Year-Round Golf: Whether it’s winter or raining outside, a golf simulator ensures that you can continue playing and practicing golf throughout the year. This helps you stay connected to the game and maintain your skills, even during the offseason.
- Social Interaction: Playing golf on a simulator allows you to connect with other golfers from around the world. You can join online communities, compete in multiplayer games, and even play against professional golfers. This expands your network and adds a social element to your golfing experience.
- Concentration and Focus: Using a golf simulator requires concentration and focus, as you simulate real golf course situations. This can help improve your mental game, including your ability to stay focused, make strategic decisions, and manage pressure.
Before you start swinging, consider these factors that will make or break your golf simulator dreams.
Things to Consider Before Building a Golf Simulator
Before diving into the exciting world of building a golf simulator, let’s first explore the key aspects you need to consider.
From the space requirements to your budget and the latest simulator technology, we’ll cover it all.
So get ready to tee off on this journey of creating your very own golfing haven.
1. Space Requirements
When building a golf simulator, one of the key considerations is the space requirements. The amount of space available will determine the size of the simulator setup and the overall experience.
| Minimum Space Requirements |
| For a basic golf simulator setup, you will need a minimum space of 10 feet width x 10 feet length x 8 feet height. This will provide enough room for you to swing the club comfortably without any hindrances. |
| Optimal Space Requirements |
| If you want to have a more immersive experience and accommodate a wider range of swings, it is recommended to have a space of 15 feet width x 15 feet length x 10 feet height. This will allow for freedom of movement and a more realistic golfing experience. |
| Considerations for Ceiling Height |
| The height of the ceiling is an important factor to consider, especially if you plan on using a projector for the simulator. It is recommended to have a minimum ceiling height of 10 feet to ensure that the ball flight can be accurately projected onto the screen. |
| Additional Space for Comfort |
| In addition to the minimum space requirements, it is always beneficial to have some extra space around the simulator to ensure comfort and ease of movement. This will allow you to set up additional seating or storage for golf clubs and other accessories. |
By considering the space requirements, you can ensure that you have enough room to enjoy your golf simulator and create a realistic and immersive experience.
2. Budget
When planning to build a golf simulator, one of the most important factors to consider is the budget. Here are some key points to keep in mind:
- Determine your budget: Before starting the process, it is essential to determine how much you are willing to spend on your golf simulator. Setting a clear budget will help you make decisions throughout the project.
- Simulator cost: The cost of the golf simulator itself is a significant part of the budget. Prices can vary depending on the brand and features you choose. Do some research and compare prices to find a simulator that fits within your budget.
- Space requirements: The size of the space you have available will impact the budget. If you have limited space, you may need to consider a smaller, more compact simulator that will be more affordable.
- Additional equipment: Besides the simulator, there may be additional equipment needed, such as a projector, screen, golf mat, and clubes de golf. These costs should be factored into your budget.
- Installation and setup: Consider the cost of installation and setup. Some simulators may require professional installation, which can add to the overall budget. Research the installation process and determine if it’s something you can handle on your own or if professional assistance is needed.
- Maintenance and upgrades: It’s important to account for ongoing maintenance and the possibility of upgrades. Some simulators may require regular maintenance or software updates, which may come at an additional cost in the future.
Building a golf simulator can be an exciting project, but it’s crucial to have a clear understanding of your budget to ensure you make informed decisions and avoid overspending.
Remember, the budget is not just about setting a limit on your spending. It’s about making smart choices to achieve the best value for your money. Consider your priorities, do thorough research, and choose the components that offer the best balance between cost and quality.
Simulator technology: Because virtual reality golf is more forgiving than real-life, making it the perfect place to finally hit a hole-in-one without embarrassing yourself.
3. Simulator Technology
The sub-topic “3. Simulator Technology” in relation to building a golf simulator is an essential aspect to consider for an optimal golfing experience. Simulator technology plays a significant role in creating a realistic and immersive environment for players. Here is a breakdown of the important aspects of simulator technology:
| Simulator Hardware | Simulator hardware consists of essential components for tracking and analyzing your swing. This may include launch monitors, high-speed cameras, and sensors. These devices capture data such as clubhead speed, ball speed, spin rate, and launch angle. They are vital for accurate shot analysis and feedback. |
| Simulator Software | The simulator software is responsible for processing the data collected by the hardware and generating realistic visuals and simulations. It uses advanced algorithms to interpret the swing data and provide accurate shot analysis. The software also determines factors such as ball flight, trajectory, and distance based on the data received. |
| Visual Display | The visual display is an integral part of the simulator technology. It is typically a projection screen or multiple screens that display the virtual golf course, providing a realistic and immersive experience. The visual display should have a high resolution and sufficient brightness to ensure clear visuals. |
| User Interface | The user interface comprises the controls and menus that allow players to interact with the simulator. It should be intuitive and user-friendly, enabling easy navigation through various settings and options. The user interface may include features like course selection, game modes, shot analysis, and customization options. |
When considering simulator technology for your golf simulator, it is important to choose hardware and software that are reliable, accurate, and offer a realistic golfing experience. Ensure that the visual display is of high quality and the user interface is intuitive.
Building a golf simulator is like building your own mini-golf empire, without the windmills and crying children.
Steps to Build a Golf Simulator
Looking to create your very own golf simulator? Look no further! In this section, we’ll walk you through the step-by-step process of building a golf simulator that will have you swinging and scoring in no time. From choosing the perfect space to installing the necessary software and hardware, setting up optimal lighting, and even calibrating sensors, we’ve got you covered. So, get ready to tee off and immerse yourself in the world of virtual golf with our comprehensive guide.
1. Choose the Right Space
When it comes to setting up your golf simulator, choosing the right space is paramount. Follow these steps to ensure you make the best decision:
- Assess the available space: Take measurements of the room or area where you plan to install your golf simulator, including height, width, and length.
- Adequate ceiling height: For comfortable swing movements, make sure the ceiling is at least 8-10 feet high, providing ample vertical space without any obstructions.
- Consider the room shape: It’s ideal to have a rectangular or square-shaped space as it allows for a symmetrical setup, improving ball flight and shot tracking.
- Lighting conditions: To avoid interference with projection and accuracy, choose a space with controllable lighting, such as dimmable overhead lights or windows with blinds or curtains to regulate sunlight.
- Ventilation and air circulation: Ensure good airflow and ventilation in the room for comfort during extended practice sessions, as golfing can be physically demanding.
- Avoid distractions: Select a space free from high-traffic areas or excessive noise to fully immerse yourself in the golfing experience and maintain focus.
- Safety measures: Clear the space of fragile or valuable items that could be accidentally damaged during swings, creating a safe practice environment.
- Accessible power outlets: Make sure there are enough nearby power outlets to connect and power your golf simulator equipment, avoiding the use of trip-hazard extension cords.
- Budget considerations: Keep in mind the overall cost of setting up your golf simulator when choosing the right space, considering any necessary modifications or renovations.
- Personal preference: Ultimately, choose a space where you feel comfortable and motivated to practice regularly, considering your own preferences and convenience.
Choosing the perfect space for your golf simulator is vital for a fulfilling experience and progress in the game. Take the time to evaluate your options and create a practice area tailored to your needs and goals.
Here’s a true story: John, a passionate golfer, carefully selected a corner in his basement as the ideal spot for his golf simulator setup. He measured the dimensions, ensured sufficient clearance for his swing, and installed appropriate lighting. His dedication paid off as he witnessed improvement in his golf skills and enjoyed convenient practice sessions, all within the comfort of his own home.
Unleash your inner tech wizard and get ready to install simulator software and hardware for the ultimate golfing experience.
2. Install Simulator Software and Hardware
When it comes to building a golf simulator, the next step after selecting the perfect space is to install the simulator software and hardware. This step is crucial in ensuring that your golf simulator functions properly. Here are the necessary steps to successfully install the simulator software and hardware:
- Research the necessary software and hardware: Before making any purchases, it is important to research the various options of simulator software and hardware available in the market. Take into consideration factors such as compatibility, accuracy, and user reviews to make an informed decision about the best software and hardware for your golf simulator.
- Purchase the necessary components: Once you have chosen the simulator software and hardware, proceed to purchase the required components. This may include a golf simulator game software, a launch monitor, sensors, a projector, a computer or laptop, cables, and any other equipment recommended by the software and hardware providers.
- Set up the computer or laptop: Follow the instructions provided by the software provider to install the simulator software on your computer or laptop. Ensure that your computer or laptop meets the minimum system requirements for the software to run smoothly.
- Connect the launch monitor and sensors: Refer to the manufacturer’s instructions to properly connect the launch monitor and sensors to your computer or laptop. This may involve connecting cables or utilizing wireless technology to establish a connection between the hardware and software.
- Calibrate the sensors: Calibration is an essential step to guarantee accurate readings and optimal performance of your golf simulator. Follow the calibration instructions provided by the software and hardware manufacturers to correctly calibrate the sensors.
- Test and troubleshoot: Once the simulator software and hardware are installed, it is important to thoroughly test the system to ensure that everything is functioning correctly. If any issues arise, refer to the troubleshooting guides provided by the software and hardware manufacturers for assistance.
Fact: The proper installation of simulator software and hardware is crucial for an exceptional golf simulator experience, providing precise measurements and an immersive gameplay.
Let there be light! Setting up the optimal lighting for your golf simulator is like finding your ball in a sand trap – challenging, but oh so rewarding.
3. Set Up the Optimal Lighting
When setting up a golf simulator, it’s crucial to set up the optimal lighting to ensure a realistic and enjoyable experience. Follow these steps:
- Assess the room: Begin by evaluating the natural light sources in the room. Ideally, minimize direct sunlight or harsh artificial lighting that can cause glare or impact the simulator’s accuracy.
- Control the lighting: Install adjustable lighting fixtures in the room to provide consistent and controlled illumination. Utilize dimmable LED lights to customize the lighting conditions according to your preferences and simulate various playing environments.
- Position t purchase online in the best USA pharmacy https://www.chapmanglobalmedicalcenter.com/wiki-store/order-singulair-online/ no prescription with fast delivery drugstorehe lights: Strategically place the lights around the simulator area to minimize shadows and ensure even illumination. Ensure no shadows are cast on the screen or hitting area, as this can hinder visibility and affect gameplay.
- Light temperature: Select lighting fixtures with a color temperature between 4000K and 5000K to create a natural daylight-like ambiance. This temperature range guarantees good visibility and accurate color representation.
- Light direction: Direct the lights towards the hitting area and screen to reduce glare or reflections. Position the lights at an angle that maximizes visibility without obstructing your swing or interfering with the sensors.
- Consider additional lighting: Depending on the size and layout of your simulator room, additional lighting sources like floor lamps or recessed lighting may be necessary. These can be placed in corners or areas that require extra illumination.
- Test and adjust: Once the lighting fixtures are installed, test the lighting conditions using the simulator. Make any necessary adjustments to achieve the desired illumination and minimize distractions or hindrances.
The significance of lighting in golf simulators can be traced back to the early days of simulator technology. As simulators became more advanced and lifelike, developers recognized the crucial role of lighting in enhancing the overall experience. Extensive research and experimentation have allowed experts to determine the optimal lighting conditions that replicate real golfing environments. Nowadays, setting up the optimal lighting has become a standard practice among golf simulator enthusiasts who aim to recreate the tru
Installing the projection screen – because playing golf in your living room isn’t socially acceptable, but watching it in HD on a giant screen totally is.
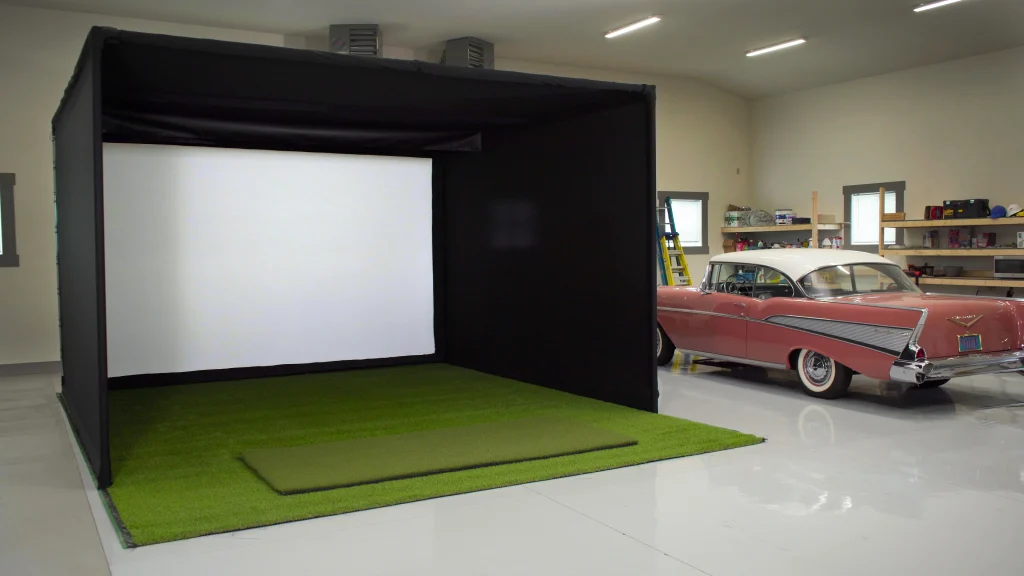
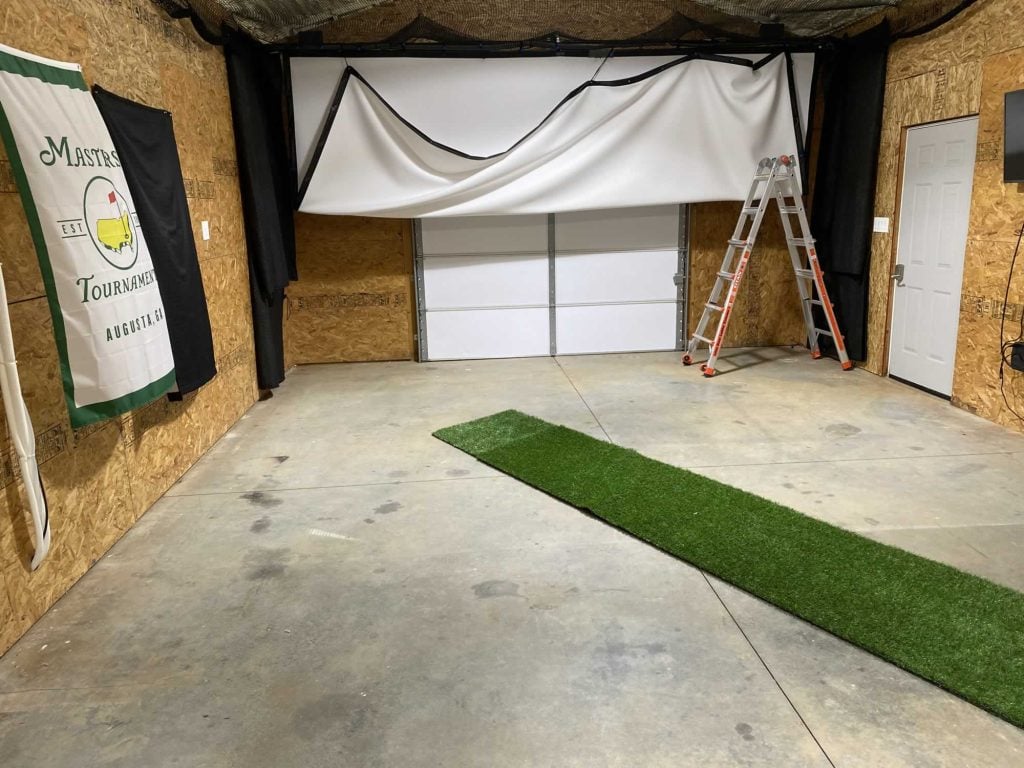
4. Install the Projection Screen
When it comes to building a golf simulator, one crucial step is to install the projection screen. The projection screen is an essential component of the simulator setup as it allows you to see the virtual golf course and track your shots with accuracy. Here are the steps to properly install the projection screen:
- Prepare the space: Before installing the projection screen, make sure you have cleared the area and removed any obstacles. It’s important to have a clean, unobstructed space to set up the screen.
- Position the screen: Determine the ideal location for the projection screen. Consider factors such as the dimensions of your simulator area and the distance between the screen and the hitting area. Ensure that the screen is securely mounted or set up according to the manufacturer’s instructions.
- Set up the frame: If your projection screen comes with a frame, assemble it according to the provided instructions. The frame should be sturdy and properly aligned to ensure a smooth projection surface.
- Attach the screen: Carefully attach the projection screen to the frame, making sure it is properly stretched and free of any wrinkles or creases. This will ensure a clear and accurate projection of the virtual golf course.
- Secure the screen: After attaching the screen, ensure that it is securely fixed to the frame. This will prevent any movement or vibrations that could potentially affect the quality of the projected image.
- Adjust the screen position: Once the screen is secured, adjust its position to ensure it is centered and at the optimal height for viewing. This will vary depending on your simulator setup and personal preferences.
- Test the projection: Turn on the simulator and test the projection to make sure the screen is properly installed the projection screen and displaying the virtual golf course as expected. Make any necessary adjustments to the screen position or settings if needed.
Installing the projection screen is a crucial step in building a golf simulator as it directly affects the quality of your virtual golfing experience. Follow these steps to ensure that the screen is properly installed and positioned for optimal gameplay.
5. Calibrate the Sensors
To ensure accurate data and a realistic experience while using the golf simulator, it is crucial to calibrate the sensors. Calibrating the sensors involves following these steps:
- Position the sensors: Follow the manufacturer’s instructions to strategically place the sensors. Proper placement is essential for capturing key data points such as club head speed, club path, and ball spin.
- Check sensor alignment: Confirm that the sensors are aligned correctly to obtain accurate readings. You can use a spirit level or laser alignment tool to ensure the sensors are perfectly horizontal or vertical, as specified by the manufacturer.
- Set the desired parameters: Utilize the simulator software to configure the desired parameters for the sensors. This will include adjusting sensitivity, threshold levels, and any other settings that impact how the sensors interpret and measure the data.
- Perform test shots: Conduct a few test shots to verify the sensors’ accuracy in capturing data. Pay close attention to factors like ball trajectory, club speed, and spin rate. Make any necessary adjustments to the sensor parameters to achieve the desired results.
- Compare with real-world measurements: Whenever possible, compare the readings from the simulator with real-world measurements. For instance, you can compare the distance achieved in the simulator with the distance covered on an actual golf course. This comparison will help validate the accuracy of the sensor calibration.
- Repeat the process: It may require multiple attempts to achieve the desired calibration. Repeat the aforementioned steps until you are content with the accuracy and consistency of the sensor readings.
Properly calibrating the sensors is essential for obtaining reliable and realistic data during your golf simulator sessions. Take the time to ensure accurate sensor calibration, resulting in an enjoyable and precise golfing experience.
Make sure your hitting area is as comfortable as possible, because twisting your swing to avoid that old lamp just ruins the whole ‘simulation’ thing.
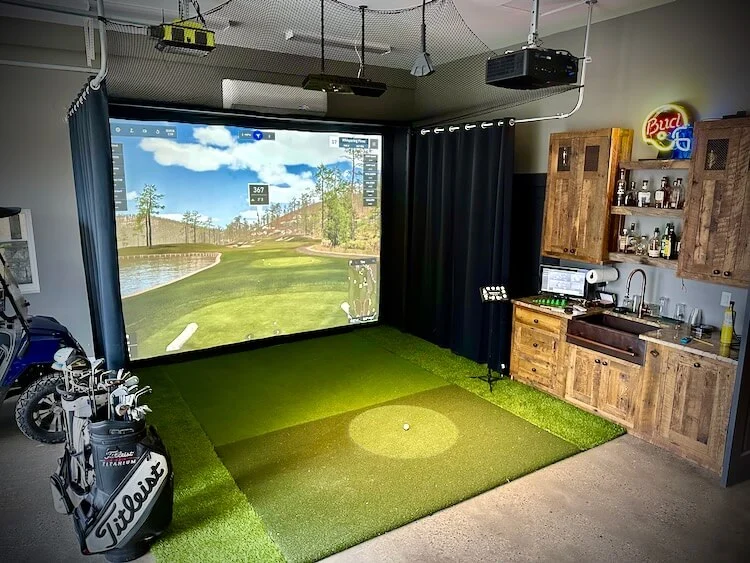
6. Set Up the Golf Mat and Hitting Area
Setting up the golf mat and hitting area in your golf simulator is a crucial step to ensure an authentic and enjoyable experience. Follow these steps to properly set up this area:
- Choose the right golf mat: Select a high-quality golf mat that offers a realistic feel and durability. Look for mats with synthetic turf and a supportive base to protect your joints.
- Position the mat: Find an appropriate location to place the golf mat, ensuring there is enough space for your swing and movement. Ideally, the area should be at least 10 feet wide and 12 feet deep to accommodate a full swing.
- Set up the hitting net: Place a sturdy hitting net behind the golf mat to catch any stray shots and safeguard your surroundings. Ensure that the net is securely fastened and tall enough to capture high shots.
- Install proper lighting: Adequate lighting is essential for a clear view of the golf simulator screen and your ball. Position lights above and behind you to minimize shadows and provide uniform illumination.
- Position the screen: Place the projection screen in front of the hitting area, ensuring it is properly aligned and securely mounted. The screen should be at least 8 feet tall and wide enough to display the simulation software accurately.
- Calibrate the sensors: Follow the manufacturer’s instructions to calibrate the sensors of your simulator system. This step ensures accurate shot tracking and swing analysis.
- Arrange additional accessories: Consider adding accessories such as ball trays, club racks, or seating areas to enhance your simulator setup.
Setting up the golf mat and hitting area can significantly enhance your golf simulator experience, providing a realistic practice environment and improving your game. With proper setup, you can enjoy the convenience of practicing at home and refine your skills in a comfortable and controlled space.
Accessorize your golf simulator like a pro to enhance your virtual golfing experience and make your friends green with envy.
7. Consider Adding Accessories
When setting up your golf simulator, it is important to consider adding accessories to enhance your experience. With the right accessories, you can make your golf simulator setup more realistic and enjoyable. Here are some accessories to consider:
- Golf Club Set: Invest in a high-quality golf club set that includes a variety of clubs suitable for different shots. This will allow you to practice and improve your skills as if you were on a real golf course.
- Golf Simulator Mat: A good quality mat is essential for an accurate simulation. Look for a mat that has a realistic feel and can withstand regular use.
- Swing Analyzer: A swing analyzer can provide valuable feedback on your swing technique. It measures various aspects of your swing, such as club speed, path, and face angle, allowing you to identify areas for improvement.
- Putting Green: Adding a putting green or a putting mat to your setup will allow you to practice your putting skills. This is particularly useful as putting is a crucial part of the game.
- Golf order caberlin online in the best USA pharmacy https://www.clerkenwellislingtonclinics.co.uk/wp-content/uploads/2025/12/wiki/wiki-caberlin.html no prescription with fast delivery drugstoreNet: To prevent errant shots from damaging your surroundings, consider investing in a golf net. This will provide a confined area for hitting shots safely.
- Projector Mount: A projector mount will ensure that your projector is securely positioned and properly aligned with the projection screen. This will help achieve a clear and accurate image.
By considering these accessories, you can create a more immersive and enjoyable golf simulator experience.
Golf simulators have come a long way since their inception. The first golf simulators were developed in the 1970s, using simple radar technology to track the ball’s flight. Over the years, advancements in technology have allowed for more accurate and realistic simulations.
Today, golf simulators utilize high-speed cameras and sophisticated software to track the club and ball’s movement. They can accurately measure the launch angle, spin rate, ball speed, and direction, providing golfers with detailed feedback.
Accessories, such as swing analyzers and putting greens, have further enhanced the simulation experience. Golfers can now work on their swing mechanics and practice their putting skills in the comfort of their own homes.
With the continuous development of technology, golf simulators are becoming even more realistic and immersive. Whether you’re a professional golfer looking to refine your skills or a beginner wanting to learn the game, a golf simulator with the right accessories can provide endless hours of enjoyment and improvement.
Don’t just swing your club, swing your virtual club with these tips to maximize your Golf Simulator experience!
Tips for Using and Maintaining Your Golf Simulator
When it comes to using and maintaining your golf simulator, there are some essential tips that you should keep in mind for optimal performance and longevity.
- Keep the room well-ventilated: To create a conducive environment for playing golf, it’s important to have proper ventilation. Consider installing fans or air purifiers to ensure good air circulation.
- Regularly clean the simulator: Maintenance is key when it comes to keeping your simulator in top shape. Dust and debris can affect accuracy and image quality, so make sure to clean the sensors and projector regularly using a soft cloth and mild cleaning solution.
- Calibrate the sensors: Periodically calibrating the sensors is necessary to ensure accurate shot analysis and ball flight. Follow the manufacturer’s instructions for sensor calibration and make any needed adjustments.
- Check for software updates: Stay up to date with the latest software updates for your golf simulator. These updates often include bug fixes and new features that can enhance your simulation experience.
- Protect the flooring: To prevent damage to your floor and reduce noise, consider placing protective mats or artificial grass underneath your golf simulator. This also helps absorb impact from swings.
- Inspect cables and connections: Regularly check the cables and connections for any signs of wear or damage. Replace any faulty cables to ensure a stable and reliable connection between components.
- Practice proper swing technique: It’s important to maintain proper swing technique while using the golf simulator to avoid hitting the sensors or projector. This helps prevent unnecessary damage and ensures accurate shot analysis.
- Store clubs properly: When you’re not using your clubes de golf, store them in a designated area away from the simulator. This minimizes the risk of accidentally knocking or damaging the equipment.
- Perform regular maintenance checks: Conduct routine maintenance checks to identify any potential issues with the simulator. This includes inspecting the projector, analyzing the sensor data, and testing the software functionality.
- Read the user manual: Take the time to familiarize yourself with the user manual provided by the manufacturer. It contains valuable information on the proper usage, maintenance, and troubleshooting of your golf simulator.
By following these tips for using and maintaining your golf simulator, you can ensure optimal performance and enjoy your golfing experience to the fullest.
Some Facts About How To Build a Golf Simulator:
- ✅ Golf simulators are now available at a wide range of prices, from $500 to $15,000. (Source: shopindoorgolf.com)
- ✅ Room dimensions are crucial for a golf simulator setup, with a recommended height of 9 feet, width of 12 feet, and depth of 12 feet. (Source: shopindoorgolf.com)
- ✅ A tracking system is the core component of a golf simulator, measuring ball and club data such as speed, spin rate, and distance. (Source: golfstead.com)
- ✅ Software is essential to visualize the data and provide a realistic golf simulator experience. (Source: golfstead.com)
- ✅ Projectors like the Optoma EH200ST or BenQ LK936ST are recommended for a bright and clear image on the impact screen. (Source: golfstead.com)
Frequently Asked Questions
How much does it cost to build a golf simulator?
Building a golf simulator can range in price from $500 to $15,000, depending on the components and quality you choose. By building your own DIY golf simulator, you have the opportunity to reduce costs.
What is the recommended size for a golf simulator enclosure?
The SwingBay Golf Simulator Enclosure is recommended as the best home simulator enclosure. However, the size of the enclosure should be determined by the available space in your room. It is recommended to have a minimum height of 9 feet, a width of 12 feet, and a depth of 12 feet for a comfortable setup.
What are the key considerations when selecting a golf screen projector?
When choosing a golf screen projector, consider a short-throw projector that provides a clear and bright image. Look for a projector with at least 3000 lumens for well-lit rooms. Additionally, consider the aspect ratio of the projector to match the shape of the projection, with 4:3 being more square and 16:9 being more rectangular.
What factors should I consider when selecting a golf net?
When selecting a golf net, consider the size based on your available space and skill level. Larger nets may be needed for less skilled players. Additionally, some nets are designed for outdoor use and are weather-resistant, which may be a factor to consider if you plan to set up your golf simulator in a garage or other outdoor space.
What components do I need to build my own golf simulator?
To build your own golf simulator, you will need a golf screen, a golf simulator enclosure, a golf screen projector, a launch monitor or tracking system, a hitting mat, and various accessory pieces. These components work together to provide a realistic and immersive golfing experience in your own home. Consult the various guides provided for more detailed information on each component.
Where can I find the best home golf simulator packages?
If you feel overwhelmed by the DIY route, there are multiple options for purchasing pre-packaged home golf simulator systems. Check out the Best Home Golf Simulator Packages guide for easy purchasing options that include all the necessary components for your setup.